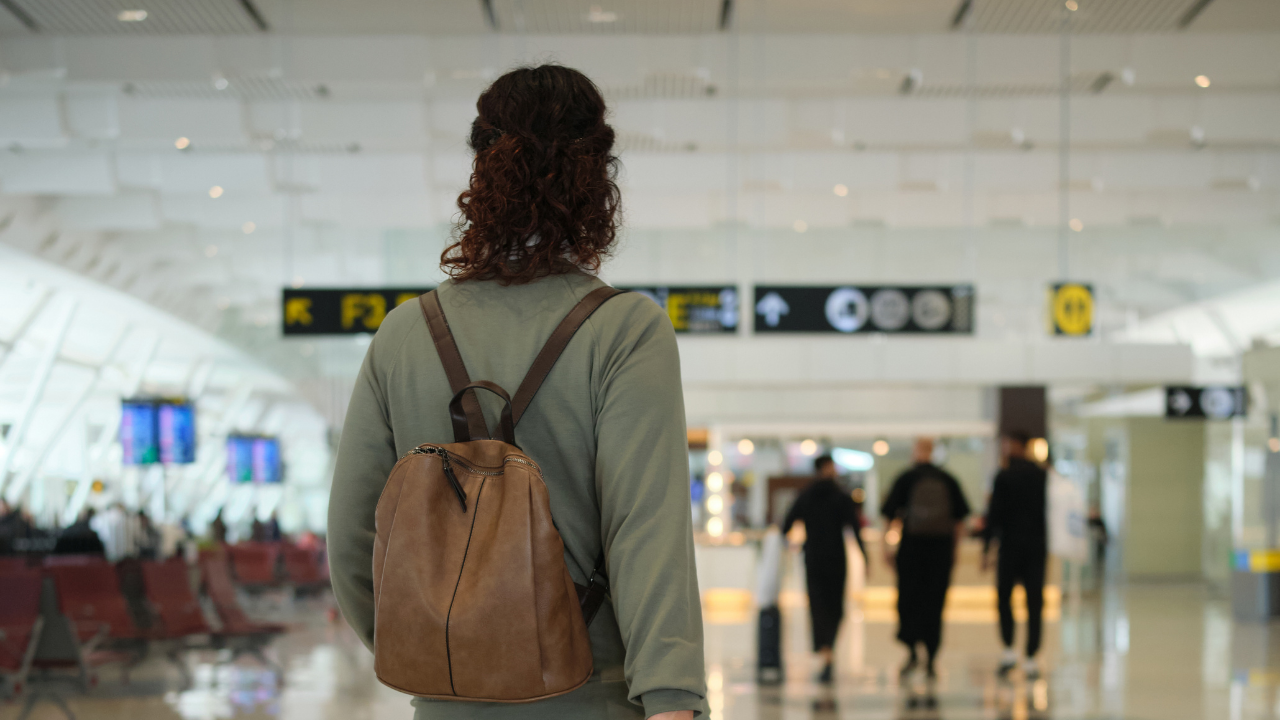
Travel Archives - RoutineBase

Airport Travel Routine: A Simple Plan for Smoother Trips

A good airport travel routine comes down to three short check-ins: one two days before you fly, one the night before, and one at your front door. Each takes five to ten minutes. Together they cover the things that actually derail trips: the wrong ID, a carry-on that stalls the security line, and leaving the house later than you meant to.

airport travel routine

Here’s the whole routine at a glance:

  1. Two days out: confirm your ID, your terminal and your check-in.
  2. The night before: pack your carry-on in the order you’ll unpack it at security.
  3. At the door: touch phone, wallet and ID, then leave on time.

The rest of our article fills in each step, then covers arrival times, how to choose the way you get there, and what to sort out if you’re the one doing the drop-off.

Why a Routine Works Better Than a Packing List

Most airport checklists are long lists of things. They help once, and then you lose the list. A routine is a short sequence you run in the same order every trip, so you aren’t rebuilding it from scratch while also trying to find your charger.

The aim isn’t a flawless departure. It’s a boring one, where nothing surprising happens between your front door and your seat.

The Three-Checkpoint Airport Routine

Two Days Out: The Paperwork Pass

Do this while there’s still time to fix something. It’s the easiest checkpoint to skip, and the only one that lets you solve a problem instead of just discovering it.

  • Check your ID. Adults 18 and older need acceptable ID at the TSA checkpoint. Since May 7, 2025, a state driver’s license or ID has to be REAL ID compliant (look for the star), or you need another accepted document such as a passport. TSA keeps the full list of acceptable IDs on its site, and it can change without notice. TSA doesn’t require ID for children under 18 on domestic flights, but it’s worth asking the airline about their specific rules.
  • Look at your passport dates if you’re flying internationally. Many countries expect your passport to stay valid for months beyond your return date, so check your destination’s rule instead of assuming.
  • Check in online. Many airlines open online check-in about a day before departure. Save the boarding pass to your phone and screenshot it, in case the signal drops at the terminal.
  • Confirm the flight time and terminal. Schedules and gates shift, and a big airport can have several terminals that are a long way apart.
  • Sort medications and chargers now, not at 10 p.m. the night before.

The Night Before: Pack in Security Order

What slows people down at security isn’t how much they packed. It’s where it is. Pack so the things you’ll have to pull out are on top or in an outside pocket, reachable in one move.

The big one is liquids. TSA’s 3-1-1 rule means each passenger can carry liquids, gels and aerosols in containers of 3.4 ounces (100 milliliters) or less, all inside one quart-size bag. The TSA liquids rule includes everyday items like toothpaste, shampoo, mouthwash and lotion, which is why people get caught out. TSA allows medically necessary liquids in reasonable quantities beyond that limit. Keep them separate from the rest and tell the officer.

A few other things belong in the night-before pass:

  • Charge your phone and any battery pack.
  • Set out what you’ll wear, including shoes that slip off easily.
  • Decide your leave-by time and write it where you’ll see it. Work it out from the table below, then add ten minutes.

At the Door: The Pocket Check

Before you pull the door shut, touch each of these: phone, wallet or ID, keys, charger. Physically touching them works better than thinking “I’ve got everything,” because it turns a guess into a check.

Then take a 30-second lap of the house: stove off, windows shut, trash out, thermostat set. If you’re leaving for several days, that lap is the difference between a relaxed flight and ten minutes of wondering about the iron.

How Early Should You Get to the Airport?

Plan on arriving about two hours before a domestic flight and about three hours before an international one. That’s the guidance most travel sites repeat, and it holds up for most travelers.

Your situation Plan to arrive
Domestic flight, normal day About 2 hours before departure
Domestic flight, holiday or peak weekend About 2.5 hours before departure
Domestic, carry-on only, with TSA PreCheck Some travelers manage 75 to 90 minutes, but only if you’ve done it before and know your airport
International flight About 3 hours before departure
No REAL ID or other accepted ID At least 3 hours, which is TSA’s own recommendation

Work backward from boarding, not takeoff. Boarding commonly starts around 30 minutes before a domestic departure, and the gate door can close 15 to 20 minutes before takeoff. So “I’m at the airport 90 minutes early” and “I’m at my gate before boarding starts” can be very different things.

To set your own leave-by time, add up the legs: travel to the airport, a 15-minute buffer for parking or the curb, bag drop if you’re checking anything, security, and the walk to your gate. If the total looks tight on paper, it will feel tighter on the day.

airport wait

Dropping Someone Off at the Airport: Check the Rules First

If you’re the one driving someone to the airport, your routine is shorter, but it has one trap: the curb. Many airports limit how long you can stop outside departures, and the time limits and fees vary from one airport to the next. Look up your airport’s drop-off page the night before, not while you’re circling the terminal with a suitcase in the back.

It also helps to agree three things before you leave: which terminal, which door (usually the airline’s), and who’s carrying what. Say goodbye in the car, if you can, and keep the curb part to a minute or two.

If you’re flying from a UK airport, this check is worth even more. The RAC found that 16 of the UK’s 20 busiest airports raised their terminal drop-off charges over the past year, with the average now £7 (roughly $9), and all 20 now charge for drop-off at the terminal. The government has announced a review of the fees. Several of the busiest airports use barrier-free drop-off zones where you pay online afterward, and missing the deadline can bring a penalty of up to £100, so it’s a charge you can’t forget about.

The good news is that most major UK airports also have a free drop-off option, usually in a long stay or park and ride car park with a short walk or a complimentary shuttle bus to the terminal. The Free Airport Drop Off Checker from Cheap Airport Parking lets you enter your airport and see whether a free option exists, where it is, and how passengers get from there to the terminal. At Heathrow, for example, the free option is the Park & Ride car park for each terminal, with a shuttle bus to the terminal building. Airports change these rules, so confirm on the airport’s own website before you set off, which the checker itself recommends.

Leaving the Car Behind: Compare Parking Before You Book

If you’re driving yourself and leaving the car for the trip, don’t book the first lot you find. Prices and transfer times vary by date and by lot, so compare at least two options, and read the details that matter: how far the lot is from the terminal, how often the shuttle runs, and what the cancellation terms are.

For UK airports, parking sites such as Purple Parking, Cheap Airport Parking and SkyParkSecure are common places to compare prices. For a US airport, start with the airport’s own website, which lists its on-site lots and rates and usually takes reservations.

Which Way Should You Get There? A Quick Decision Guide

You don’t need to decide this fresh every trip. Pick a default for each airport you fly from and write it in your phone’s notes.

Option Works best when Watch for
Drive and park Longer trips, lots of bags, traveling as a family Booking ahead and the time the lot shuttle adds
Get dropped off Short trips, very early or late departures Curb time limits and fees at your airport
Rideshare or taxi An unfamiliar airport, or no one available to drive Pickup waits and traffic at busy hours
Public transit The airport has a rail link and you’re traveling light First and last service times, and the last stretch with bags

Questions People Ask Before Flying

Do I need a REAL ID to fly? Since May 7, 2025, adults need a REAL ID-compliant license or another accepted document, such as a passport, at the TSA checkpoint. If you arrive without one, you may still be able to get through after an identity check and extra screening, but it isn’t guaranteed.

What is the TSA 3-1-1 rule? Liquids, gels and aerosols in your carry-on must be in containers of 3.4 ounces (100 milliliters) or less, packed in one quart-size bag per passenger.

How early should I arrive for an international flight? About three hours before departure is the usual guidance, and a little more at a large hub or during a peak travel period.

Restock Before You Unpack

When you get home, do one thing before you touch the laundry: refill the quart bag, put the charger back in the carry-on, and clear out the old boarding passes. It takes ten minutes, and it means your next trip’s night-before pass is already half done.

Next time you book a flight, put the two-day check in your calendar the same day. The routine only works if the first step actually happens.

Two Weeks in Vietnam: How Far Can You Get?

Fourteen days sounds generous until you unfold a map of Vietnam and realize the country stretches over 1,000 miles from top to bottom. That length creates a real planning problem: do you move fast and cover distance, or stay put and go deep? The answer depends on what kind of trip actually appeals to you, but there are a few realistic routes worth knowing before you book flights.

Vietnam

The North-to-South Classic

The most common two-week itinerary runs from Hanoi down to Ho Chi Minh City, hitting the major stops in between. A typical version looks like this: two or three days in Hanoi, an overnight on Ha Long Bay, a stop in Hue or Hoi An, a few days around Da Nang’s beaches, then on to Ho Chi Minh City with a side trip to the Mekong Delta. This route covers the country’s geographic and cultural range, but it means packing and unpacking every two to three days.

It works best if you treat travel days as travel days, not bonus sightseeing time. Domestic flights between Hanoi, Da Nang, and Ho Chi Minh City run about 1.5 to 2 hours each, and budget carriers like VietJet and Bamboo Airways keep fares low if booked a few weeks ahead. Trains are slower but scenic, especially the Hai Van Pass stretch between Hue and Da Nang.

What Two Weeks Actually Buys You

Fourteen days, realistically, gets you four or five destinations without feeling rushed every single day. Trying to add a sixth or seventh stop usually means one-night stays that turn into logistics rather than travel. A common mistake is cramming in Sapa, Ninh Binh, Hoi An, Nha Trang, and Phu Quoc all in the same trip — each one deserves at least two nights, and the transfers between them eat hours you won’t get back.

A tighter, smarter version of two weeks might look like Hanoi and Ha Long Bay (4 days), Hoi An and Hue (4 days), and Ho Chi Minh City with the Mekong Delta (4 days), leaving two days as buffer for flight delays or a place you want to linger. This kind of structure allows for slower mornings and actual downtime, rather than a trip that reads like a checklist.

Going Deep Instead of Wide

Some travelers skip the north-south sprint entirely and pick one region to explore properly. Central Vietnam alone — Hue, Da Nang, Hoi An, and the nearby Cham Islands or Ba Na Hills — can fill ten days without repeating an experience. This approach suits anyone who wants to actually relax on a trip rather than spend it on buses, trains, or in airport lounges.

The south offers a similar depth option: Ho Chi Minh City, the Mekong Delta, and Phu Quoc Island make a workable 10 to 12 day loop with beach time built in. The north has its own version with Hanoi, Ha Long Bay, and the rice terraces around Sapa or Mu Cang Chai. None of these regional loops require internal flights at all, which cuts down on both cost and stress.

Where Tour Packages Fit In

For travelers who don’t want to spend hours comparing train schedules and overnight cruise operators, Vietnam tour packages can be a practical shortcut, especially for a first visit. Many of these packages are built around the exact north-to-south route described above, with transport, guides, and hotels already arranged, which removes a lot of the guesswork from a trip this geographically spread out. They also tend to include local insight — like which Ha Long Bay cruise operators are reliable or when to visit the Mekong Delta before tour buses arrive — that’s hard to piece together from scratch in a short planning window.

Accounting for Travel Fatigue

Vietnam’s internal transport is efficient but not instant, and two weeks of constant movement adds up. Sleeper trains and overnight buses save daylight hours but rarely deliver real rest. Factoring in at least one or two slower days, where the only plan is a market, a café, or a short walk, keeps the trip from feeling like an endurance test.

Weather also shapes how far travelers can comfortably go. The north can be cool and misty from November to March while the south stays warm and humid year-round, so a north-to-south trip might mean packing for two different climates in the same suitcase.

Vietnam

Making the Final Call

A two-week trip through Vietnam can realistically cover the country’s highlights or give a much richer look at one region, but it can’t comfortably do both. Travelers who want variety should accept a faster pace and fewer days per stop; those who want depth should narrow the map early and resist the urge to add just one more city. Either way, the strongest itineraries leave room for unplanned time, because some of the best parts of Vietnam show up outside the schedule, in a street stall or a conversation that wasn’t on the itinerary at all.

Torres del Paine vs El Calafate: Which to Visit First

Most travelers mapping out a Patagonia itinerary assume Torres del Paine and El Calafate are interchangeable stops on the same loop. They’re not. One is a national park in Chile built around three granite spires; the other is an Argentine town that serves as a gateway to glaciers. Deciding which to visit first shapes everything from your packing list to your pacing, so it pays to understand what each place actually offers before building the rest of the trip around it.

What Each Destination Actually Offers

Torres del Paine is a 700-square-mile national park in Chilean Patagonia known for its jagged granite towers, turquoise lakes, and multi-day trekking routes like the W Circuit. It demands time, layered clothing, and a tolerance for wind that can hit 60 miles per hour on an open trail. El Calafate, by contrast, is a small Argentine town on the shores of Lago Argentino, mostly used as a base for visiting Perito Moreno Glacier, a 19-mile-long ice formation you can view from boardwalks just an hour’s drive away.

The two aren’t competing versions of the same experience. Torres del Paine rewards physical effort and multi-day commitment. El Calafate offers a gentler, more accessible kind of spectacle that can be absorbed in a single day trip.

Why Logistics Should Drive Your Order

The honest answer to which comes first often comes down to flights, not preference. Most international travelers land in either Santiago or Buenos Aires, then connect to Patagonia through El Calafate’s airport or Punta Arenas in Chile, which serves Torres del Paine. If your entry point is Buenos Aires, starting in El Calafate and moving west into Chile afterward usually saves a day of backtracking.

The border crossing between El Calafate and Torres del Paine runs through Cerro Castillo, a roughly five-hour bus or private transfer that includes a Chile-Argentina border stop. Doing this crossing with a few days of energy left is easier than doing it after finishing a demanding trek. For that reason, many guides and tour operators recommend El Calafate first, glacier trekking or boat tours second, then Torres del Paine as the more physically intensive finale.

The Case for Starting in El Calafate

Starting in El Calafate lets you ease into Patagonia’s scale without immediately committing to strenuous hiking. A day at Perito Moreno Glacier, watching chunks of ice calve into the lake with a loud crack that echoes across the water, is a manageable introduction to the region’s size and silence. The town itself has solid infrastructure, including restaurants serving Argentine lamb and malbec, which makes for a comfortable landing point after a long international flight.

This order also works well if you’re still adjusting to the altitude and temperature swings common in Patagonia during shoulder seasons. You get a buffer before tackling the more demanding terrain of Torres del Paine, and you arrive at the Chilean park already acclimated rather than jet-lagged.

The Case for Starting in Torres del Paine

Some travelers prefer the opposite order, especially those booking through operators that specialize in Patagonia luxury tours and handle border logistics, lodge transfers, and trekking permits in advance. Starting with Torres del Paine means tackling the physically demanding portion while energy levels are highest, then finishing with the comparatively relaxed glacier viewing in El Calafate. For anyone planning to do the full W Circuit or add extra trekking days, front-loading that effort avoids ending the trip exhausted.

This sequence also suits travelers flying into Santiago rather than Buenos Aires, since Chile becomes the natural first stop geographically. From Santiago, a flight to Punta Arenas followed by a roughly three-hour transfer gets you into the park without the added step of first routing through Argentina.

Weather and Seasonal Timing

Patagonia’s weather doesn’t care much which direction you’re traveling, but it does affect which order makes more sense. December through February brings the strongest winds to Torres del Paine, making early morning starts on trails more practical than afternoon ones. El Calafate’s glacier tours run with fewer weather disruptions since much of the viewing happens from fixed platforms rather than exposed ridgelines.

If visiting during shoulder season, March or April, consider doing Torres del Paine first while trail conditions are still relatively dry, then closing with El Calafate as weather turns colder and less hospitable to extended outdoor hiking.

Matching the Order to Your Travel Style

Travelers short on time, with four or five days total, often get more value from choosing one destination rather than splitting days thin across both. Those with seven to ten days can comfortably do both, provided the border crossing is planned as a dedicated travel day instead of squeezed between activities.

For first-time Patagonia visitors unsure of their stamina or trekking interest, El Calafate first offers a lower-risk entry point. For those who’ve already done research, booked permits, and know they want the trekking experience, starting with Torres del Paine while motivation is highest tends to produce a more satisfying trip overall. Either order works, but the decision should come from your itinerary’s logistics and your own physical pacing, not a map that makes the two look identical.

Travelling as a Nicotine User: Practical Tips for Long Flights and Road Trips

Got a 10-hour flight coming up and no idea how you’ll cope?

Travel is stressful enough without nicotine cravings getting in the way. Throw those in your journey and your road trip suddenly gets really really long. You’re not alone in feeling this way. After all, nicotine pouch use has been increasing in recent years, with 9.5% of young adults between ages 19 and 30 using them in the past year.

Here’s the problem:

You can’t smoke on a plane. You can’t vape on a plane. And stopping every hour to smoke on a road trip gets old fast.

The good news?

Stay calm, stay legal and have some fun with just a little planning and the proper smokeless nicotine options.

Inside this guide:

  1. Why Travel Is So Tough on Nicotine Users
  2. Smokeless Nicotine Alternatives That Travel Well
  3. Tips for Long Flights
  4. Tips for Road Trips
  5. Know the Rules Before You Go

Why Travel Is So Tough on Nicotine Users

Nicotine withdrawal symptoms can begin as early as a few hours after your last dose. Cravings, irritability and difficulty concentrating… often when you’re stuck in seat 34B.

Road trips disrupt your habits. That morning cigarette after breakfast? Nope. Quick vape before walking into work? Nope.

That’s where smokeless nicotine alternatives come in.

They’re products that deliver nicotine without smoke, vapour or a lighter. Lozenges, gum and pouches are the big three. They’re silent, discreet and won’t annoy those around you. Shop around before your trip if you live in Canada, because Health Canada has limited pouches to 4 mg of nicotine each. Take a look at the range of nicotine pouches Canada travellers have to choose from. Select a strength and flavour that fits your smokeless routine before you go.

Simple, right?

Smokeless Nicotine Alternatives That Travel Well

You can’t take all nicotine products on the road with you. Some are FAR easier to travel/drive with than others. Let’s break it down…

Nicotine Pouches

Pouches are little white sachets that go between your gum and lip. ZERO smoke. ZERO spit. ZERO smell.

When traveling, nothing beats them. They are durable and don’t count as a liquid at airport security. Plus they don’t have a battery so you don’t have to follow any fire safety regulations.

Nicotine Gum and Lozenges

Gum and lozenges are the traditional method. They are marketed as cessation products, so they are accepted globally.

That means they make excellent backups. If you arrive somewhere where they have strict pouch restrictions, gum and cough drops are often allowed.

What About Vapes?

Vapes are the weird ones. Since they use lithium batteries, most airlines want you to keep them in your carry-on and never check them. Also, you can’t use them on board.

Bottom line: if you want the least hassle, go smokeless.

Tips for Long Flights

Traveling with nicotine doesn’t need to be so stressful. You just need to have a plan. So here is what works best…

Pack Smart

Put your pouches/gum in your carry-on, not your checked luggage. Bags get lost.  They also stay in icy cargo bins and hot airports which will dry your pouches out.

Keep all products in their original tins/packets. Neat labels make life easier for security/security staff/customs officials.

Check With the Crew

Most airlines are pretty silent when it comes to pouches in their policies.  Silence does not equal freedom.

If you’re not sure, ask a flight attendant ahead of time. Ten seconds of your life and avoids an embarrassing conversation later.

Time It Right

Here’s a little trick that frequent flyers swear by:

Pop a pouch or piece of gum right before boarding. Schedule your next one for the flight’s midpoint. This will even out your cravings and prevent obsessing about touchdown.

Clean Up After Yourself

NEVER leave your used pouches in the seat pocket or stuffed in the armrest. Wrap it in a tissue and throw it away. Some tins come with their own built in “used pouch” lid.

Tips for Road Trips

Road trips allow you more independence. However, they also create unique problems.

Beat the Heat

Cars get hot. Really hot.

If you leave a tin on your dashboard during summer it can get hot enough to damage your pouches. Keep them in a bag on the floor or in a small cooler. Your glovebox can also heat up, don’t think of it as a safe haven.

Keep the Car Smoke-Free

If you have children or passengers who don’t smoke you are simply being inconsiderate if you smoke in the car. It’s also illegal in many areas with kids in the car.

Smokeless varieties address this issue entirely.  No one inhales smoke, and your car doesn’t smell like an ashtray.

Plan Your Stops

You’ll still want to take routine stops for fuel, food and stretching your legs. The difference is that YOU are stopping by choice… not because your cravings are pushing you into ditch stops.

That’s a win-win.

Know the Rules Before You Go

This is the part most people skip. Don’t be one of them!

Regulations around nicotine vary between countries and evolve rapidly. Recently, France implemented a ban on possession of nicotine pouches effective April 1st, 2026. This includes personal use and not just commercial sales. Travelers may be subject to large fines if found in possession.

Before any international trip, check:

  • Your destination’s laws: Some countries ban pouches, e-cigarettes or both.
  • Any stopover countries: Rules can apply even if you’re just passing through.
  • Customs limits: Some places only allow a small personal amount.
  • Your airline’s policy: Onboard rules can differ from airport security rules.

Just google your destination.gov site. That will be the most up-to-date info. Blogs/forums may be outdated.

One more thing… smokeless doesn’t mean risk-free. Nicotine is still highly addictive, and these products should be used by adults only.  If you ever find yourself thinking about cutting back on a long trip, remember that gum and lozenges are there to help you do just that.

Ready for Take-Off?

Nicotine users shouldn’t have to spend hours suffering through cravings and anxiety while traveling. With proper preparation you can make it through any trip breezily.

To quickly recap:

  • Switch to smokeless nicotine alternatives for travel
  • Pack them in your carry-on in their original tins
  • Keep products cool on road trips
  • Check local laws before you fly

Nail these fundamentals and your next vacation will revolve around the destination… not your next hit of nicotine.

Safe travels!


Why Your Travel Routine Should Follow the Local Clock

If you’re going on a vacation, there’s no sense in expecting that your days will look the same as if you were home. 

After all, if nothing’s different when you go away, why would you even bother doing it? 

If you usually eat lunch at noon, you might expect to have lunch at the same time when you’re in another country, but that might not happen. If your dinner is normally at 6, there’s a chance you’ll find yourself sitting at an empty restaurant while all the shops are closed.

travel routine

It’s not that you’re bad at traveling. You’re simply following the wrong clock. 

Every place has its own rhythm, and if you ignore it, your whole trip will feel off the entire time.

Local Time Isn’t Just the Time Zone

Your phone will probably automatically update the time when you land, but that really only tells you the hour. 6 PM doesn’t tell you a lot. You don’t know whether the shops are closed or open here; you don’t know whether it’s dinner time or not, and so on. 

For all you know, people are still working right now.

That’s not the same as jet lag. If you’re jet-lagged, it basically means your body still hasn’t caught up with another time zone.

Moving meal times by 5 hours was observed to delay the circadian blood-glucose rhythm by almost 6 hrs and clock-gene rhythm in fat tissue by approx. 1 hr. This goes to show that WHEN you eat acts as a timing signal for your body’s circadian system. – Current Biology, “Meal Timing Regulates the Human Circadian System”

The local clock is social, meaning that it’s shaped by climate, working hours, daylight, transport, and traditions that people have developed over generations. Let’s say you’re in Spain, where summers get super hot. The people there run their errands in the morning, and then slow down during the hottest time of the day. In other places, shops might close early during some seasons.

Things like these will affect way more than where you eat. 

They’ll decide when the markets have the best selection and when the neighborhoods feel active and lively. And let’s not forget public transport. It’s less frequent in some seasons, and it’s also more crowded during certain times of day. If you’re not familiar with this and you make plans according to the schedule you have at home, you might be in for a really, really bad surprise.

Of course, not every part of your day has to change.

Researchers prepared study participants for eastward travel by moving their sleep time 1 hr earlier (per day) for 3 consecutive days; timed morning light helped produce larger advances in the body’s circadian clock. – Sleep, “Preflight Adjustment to Eastward Travel”

If you take medications, you can’t change the schedule for that, and if you’re traveling with kids, it’s probably best to stick with their usual bedtime.

Where Your Schedule Might Go Wrong

Routines are important. There’s no doubt about it. And since you’re used to living your life in a certain way, you might assume that a familiar routine will make the trip better, and sometimes it might.

Social rhythms – the timing of everyday activities (e.g., work, exercise, social activity, eat, sleep, etc.) – are time cues for regulating the biological clock; good sleepers tend to have significantly more regular daily activities compared to people with insomnia. – Chronobiology International, “Is daily routine important for sleep?”

But other times, it can also put you totally out of sync with the place you’re at.

Social jetlag during travel can affect a human’s intention to participate in their usual daily activities, with the effect mostly caused by greater fatigue. – Tourism Management, “Social Jetlag and Tourism Activities”

Dinner Could Be a Lot Later Than You Think

Let’s say it’s 6:30 PM, and you’re looking for a place to eat dinner. 

It’s a reasonable time for dinner, so you figure you’ll have plenty of restaurants to choose from until you realize that restaurants here don’t really get going until 8 or 9 PM. And that’s the story of you eating crackers alone in your hotel room. You could find an open restaurant, sure, but it could be completely empty, or parts of the menu might be unavailable until later.

You don’t have to go hungry just to adapt, but eat breakfast later or have a light snack in the afternoon to make the change easier.

travel routine

The Afternoon Isn’t Always for Sightseeing

That time between lunch and dinner looks ideal for visiting a museum, shopping, sightseeing, taking a long walk, and so on. And that makes perfect sense. But there’s a chance that the streets will be empty and the shops will be closed, and by the time everything’s open again, you could be 100% exhausted.

Check the temperature so the heat doesn’t catch you off guard, and definitely check local opening hours before you make plans.

Some Places Come Alive After Dark

Once the sun sets, a city can start to feel totally different. The lonely square could be full of people and music, and the tables could be packed all around. If you usually end your day after dinner, you’ll miss out on all this.

We’ve mentioned Spain before, so take Cádiz, for instance. If you want to experience Cádiz through sherry and flamenco, you’ll have to plan around tastings and performances, not the other way around. In other places, you may want to stay late for a night market or an outdoor concert.

You don’t exactly have to become a night owl, but you DO need to check when things happen, or you’ll miss out on all the fun.

Conclusion

A vacation in another country should be more than a list of famous buildings you want to see. It would be a real shame to spend your vacation like that when you can truly experience the place you’re at, connect with it, and try some things you’ve never tried before.

Don’t bother yourself with trying to copy whatever the locals do, though. Just tweak your simple travel routines a little. 

Push back your breakfast, eat a lighter lunch, take a break during the hottest time of the day, and maybe stay up for an hour or 2 longer than you usually do if most of the fun happens after dark.

eSIM vs Virtual Phone Number for your Family Travel Routine: What Do You Actually Need?

An eSIM is a digital SIM card built into a compatible phone.

There is no tiny plastic card to lose and no need to find a shop selling SIM cards as soon as you arrive. A travel eSIM can usually be bought online and installed before leaving home.

Once the phone connects to a supported network at your destination, the eSIM provides mobile data according to the plan you bought.

For family travel, that is pretty handy. Picture arriving after a long flight with tired children, several suitcases and a hotel transfer to find. The last thing anyone needs is to start hunting around the airport for a SIM card.

There are plenty of eSIM providers, including eSIM Plus, with plans covering different countries and regions. Prices, data allowances and coverage vary, so it is worth checking what is included before buying.

Many travel eSIMs are data-only. They provide an internet connection but do not necessarily give you a new telephone number for ordinary calls and texts. WhatsApp, Messenger, FaceTime and similar apps can still be used over the data connection.

What is a virtual phone number?

A virtual phone number is a telephone number that works through an internet-based service rather than being connected directly to a physical SIM card.

Calls and, depending on the provider, text messages are usually handled through an app or online service.

A virtual number can be useful for keeping work calls separate from personal calls, making calls without giving out your main UK number, or having a number associated with a particular country.

For a family holiday, though, a virtual number is usually less important than having mobile data.

eSIM vs virtual phone number: what is the difference?

Put simply, an eSIM gives your phone access to mobile data, while a virtual phone number gives you another telephone number that works through an online service.

They are not really alternatives. An eSIM can provide the internet connection that a virtual phone number needs, so it is possible to use both.

For example, a family travelling around Spain could use a travel eSIM for mobile data, then use WhatsApp for everyday messages and a virtual number for particular calls.

For most families heading away for a week or two, the eSIM is likely to be the more useful purchase.

Why use an eSIM on a family holiday?

Mobile data becomes surprisingly important once the usual home Wi-Fi disappears.

It is not just about checking social media beside the pool. Phones end up doing all the little jobs that keep a family holiday moving.

Google Maps gets everyone to the apartment. A translation app comes in handy when the menu isn’t quite as obvious as expected. A booking confirmation needs finding. A taxi needs ordering.

Older kids may also want to message friends or use their phones while out and about. Teenagers are generally much happier when they can check where everyone is without having to find Wi-Fi every time.

No need to find a SIM card at the airport

Physical SIM cards are still an option, but arriving with luggage, children and a transfer waiting outside is not necessarily the ideal time to compare mobile plans in another language.

With an eSIM, the plan can be sorted before leaving home.

Check that the phone supports eSIM technology and that the plan covers the country being visited. A few minutes spent checking this at home is much better than discovering there is a problem after landing.

You can often keep your usual number

Many newer phones support dual SIM or multiple eSIM profiles.

That means the normal UK SIM can often stay in the phone while the travel eSIM is used for data.

This is useful if family members, school or work still need to reach the usual number while you are abroad.

Make sure the travel eSIM is selected for mobile data and check that the normal SIM is not accidentally using roaming data.

It can make roaming costs easier to manage

A travel eSIM usually comes with a set data allowance for a certain number of days. That makes it easier to see roughly what you are spending.

How much data the family needs depends on how the phones will be used.

Maps and messaging don’t normally use huge amounts. Streaming films, watching YouTube and uploading lots of holiday photos are another matter.

A long car journey with children watching videos is going to use more data than a weekend city break spent mostly sightseeing.

When does a virtual phone number make sense?

A virtual number is more useful in specific situations.

It could be handy for a longer trip where work calls need to be kept separate from personal calls. It may also suit someone who travels regularly and wants to maintain a particular number while abroad.

A local number can also be useful for contacting hotels, tour companies or other businesses.

There is a catch, though. Not every virtual number works with every SMS verification service. Banks and other websites sometimes send security codes by text, and some services will not accept virtual numbers for this.

If the number is needed for anything important, check that the provider supports it before relying on it.

For a typical two-week family holiday, a virtual number is probably only worth considering if there is a particular reason for needing another telephone number.

What should you check before buying an eSIM?

A cheap eSIM is not necessarily the best choice for a family holiday.

Start by checking that the phone is compatible. Most recent smartphones support eSIM, but older models may not.

Then check the countries included. A plan for France will not necessarily work in Switzerland, and a trip through several countries may be better suited to a regional plan.

Look at the data allowance too. A family using phones for directions and messages will need less than one with children streaming videos during long journeys.

The expiry period matters as well. Some plans last for a set number of days after activation, while others have different rules.

Finally, check whether the plan is data-only or includes calls and texts. Never assume an eSIM automatically comes with a local phone number.

What about teenagers and their phones?

For families travelling with teenagers, mobile data can be more than a way of keeping them entertained.

It means a teenager can send a message if they get separated from the group, check a map if they take the wrong turn or contact a parent without having to find a café with free Wi-Fi.

Agreeing on a few basic rules before leaving home can prevent arguments later. Background app refresh can be restricted, unnecessary mobile data can be switched off and location settings can be checked.

It is also worth making sure everyone knows how to contact each other.

So, which one is right for a family holiday?

For most families travelling abroad, an eSIM is the more useful option.

It provides mobile data for maps, messages, bookings and all the everyday jobs that become much harder when a phone has no connection.

A virtual phone number is more specialised. It makes sense if there is a particular reason for needing another telephone number, such as work, regular international travel or specific calling requirements.

The two can also be used together. The eSIM provides the internet connection while the virtual number handles calls through its service.

For a normal family holiday, there is probably no need to make things more complicated than they need to be.

Check that the phone is compatible, choose an eSIM covering the countries being visited, install it before leaving home and check the settings before boarding the plane.

Then the phone can get on with the boring but useful jobs: finding the hotel, checking the train time, ordering the taxi and helping everyone find their way back when the family inevitably takes the wrong turn.

7 Misconceptions Students Made When Filling Out Overseas Student Health Cover

Securing health insurance is a vital step when planning your studies, yet many students approach this task with incorrect assumptions. Clearing up these misconceptions will help you make a smarter decision, ensuring you are protected while you focus on your education. This guide explains seven beliefs that lead students astray and provides the clarity you need to handle your health cover with confidence.

students

1. The Myth of One-Size-Fits-All Coverage

Many mistakenly think that all student health policies offer the same basic level of protection, leading them to choose purely based on price. In reality, different policies vary significantly in terms of hospital access, extras like dental care, and the amount they pay back for medical visits. You should never assume that your friend’s policy will suit your specific health needs or your visa requirements.

2. Believing Everything is Free at the Point of Service

It is a misunderstanding that having health cover means you will never have to pay for a doctor’s visit or medication. Most overseas student health cover policies involve a gap payment, which is the difference between the doctor’s fee and the amount your insurance will cover. Be prepared to pay these small out-of-pocket costs at the time of your appointment, as they are part of the healthcare system.

3. Thinking Pre-existing Conditions are Automatically Covered

Some students assume that once they pay for their insurance, every health issue they have had in the past will be fully covered from day one. Unfortunately, this is the case, as many insurers impose waiting periods or specific restrictions on pre-existing medical conditions. Check the policy disclosure statement carefully to see how your history is treated and if you need to provide documentation to the insurer.

4. The Belief That Public Hospitals are Your Only Choice

There is a misconception that students can access public medical services, which can lead to longer wait times. In fact, many health cover plans provide you with the option to use private hospital services for procedures, which can offer faster access. Review your policy to see which private facilities are included in your network, as this knowledge gives you more options if you ever need surgery or treatment.

5. Assuming Dental and Optical are Standard Inclusions

You might think that a comprehensive health plan automatically includes everything, such as dental work. Many basic student policies focus only on essential hospital and doctor visits, meaning extras like dental check-ups are often not covered unless you pay for a higher tier of insurance. If you think you might need these services, look for a policy that includes them or consider adding them as a top-up.

6. The Idea That Coverage Automatically Renews Correctly

It is easy to assume that your insurance will just roll over or stay perfectly aligned with your visa status without any input from you. However, if you extend your course or change your visa, you must actively update your policy to ensure there is no gap in your coverage. Failing to align your insurance dates with your visa expiration can lead to a lapse in your legal status, which is a very serious problem.

7. Misunderstanding How Emergency Transport Works

Some students incorrectly believe that all ambulance services are covered under their general health insurance or provided for free by the government. In many cases, you must have specific ambulance cover to avoid receiving a very large bill if you ever need to be rushed to the hospital in an emergency. Also, check your policy to see if this is included or if you need to add it as a separate benefit.

Secure Student Stay with OSHC

Clearing up these common misconceptions is the best way to ensure you have a health plan that works for you. By taking the time to understand what your policy covers and what it does not, you can navigate your time as a student with much security. Use this data to review your policy, ask the right questions of your provider, and enjoy your time knowing you are properly prepared for any health situation.

Why Travel Routines Help You Feel More Present on Every Trip

People often travel to escape their normal routines. Daily schedules, work responsibilities, and repetitive habits can leave you feeling mentally drained more often than you would like to admit. A trip offers something different: new places, different food, unfamiliar streets, and a breakaway from everyday pressure.

But completely abandoning structure while traveling can create the opposite effect. Rather than feeling relaxed, many travelers end up feeling overwhelmed, tired, and distracted. Too many decisions are put in their way, poor planning crops up, and constant movement can make it harder to actually enjoy the experience. That is why simple travel routines are really important.

travel routine

Not a rigid schedule, but instead a few small habits that help you to stay grounded while you are exploring somewhere new. The right routines create more freedom rather than less freedom; they allow you to focus on what you are doing rather than focusing on stress. You get time to actually experience what is right in front of you.

Morning Habits Set the Tone for the Day

The way that you start your mornings when you are traveling can have an impact on the rest of the day. Many travelers rush out early, trying to fit everything into a short trip; they skip their breakfast, panic about transport, and spend the first hours of the day stressed out because they’ve not even seen anything. A calming routine changes that pace completely.

Some travelers begin the day with a quiet coffee at a local café; others choose to take a nice short walk before they check any maps or make any secure plans. Even giving yourself an extra 30 minutes in the morning can make travel feel less chaotic. You will notice more when you take the time to slow down.

The people around you and the atmosphere of the places you are visiting, those small moments often become a memory. People remember more when a trip ends. Simple routines help to create breathing room during busy travel days.

Travel Feels Better When You Stop Overplanning

Many people treat travel like it’s a checklist; they try to visit every landmark, restaurant, and attraction that is nearby, but the result is usually feeling exhausted. Having a loose routine in place during travel means that you can avoid the constant pressure. There’s no need for you to plan every single hour to have a great experience, though.

Some travelers follow simple patterns instead. They may choose to explore one major attraction in the morning, then leave the afternoons nice and open, and spend the evening trying things like local restaurants or neighborhood spots without having any strict plan in place. 

This type of approach gives you flexibility but still provides you with a little bit of structure.  Destinations that naturally encourage a slower pace make this easier — Jimmys Beach accommodation on the NSW Mid North Coast is a good example, a quiet coastal spot where the setting itself removes the urge to overplan and the day unfolds around the beach, the water, and wherever the afternoon takes you.

You stop worrying about trying to do everything perfectly and instead enjoy where you actually are. Travel routines also help to reduce any decision fatigue. Constantly choosing where you need to go, what to eat, and how to get there becomes mentally draining after several days. A few consistent habits help to remove some of that pressure.

travel journalling

Small Comforts Matter More Than People Expect

Traveling can look glamorous online, but real travel includes delays, tiredness, heavy bags, and unexpected problems. That is why small comforts make a huge difference.

Experienced travelers usually focus on making journeys easier rather than just adding more excitement. They wear comfortable clothes, carry fewer items, and build routines around convenience.

Something as simple as knowing where to store your luggage during a long layover or before hotel check-ins can completely change your whole travel day. Rather than having to drag bags through crowded streets, you can actually enjoy the destination properly. These practical habits help to remove unnecessary stress from travel.

People often underestimate how much physical discomfort affects their mood during trips. Long queues, poor sleep, and carrying heavy luggage quickly drain your energy. Small routines help to protect your energy so you can actually focus on experiencing the trip instead.

Food Routines Make Travel More Enjoyable

Food is one of the best parts of traveling; trying dishes and restaurants helps you to connect with a place in a very different way, but travel also disrupts eating habits badly.

Many people either overeat constantly while they travel or forget to eat properly during busy days; neither feels good after a while. Creating a relaxed food routine helps to balance things out when you are traveling.

Some travelers like to start each day by making sure they have a proper breakfast before they head out exploring, whereas others keep snacks and water with them so that they can avoid relying on unexpected food stops throughout the day. Food routines also have to treat familiar moments in unfamiliar places, which means that you can have a stronger connection to the area. These types of repeated experiences help you to make a trip feel more personal.

man and mountain

The Best Trips Usually Have Slower Moments

People often remember quiet moments from trips more than they do with packed schedules, sitting near a river in the evening, reading in a park, watching people move through a busy market, and walking through streets without looking at directions. These moments definitely become something more popular because many people no longer want holidays that leave them exhausted. Travel routines naturally support our experiences; when you stop rushing constantly, you leave room for unexpected moments.

You tend to notice the small details more and become more present, and this is very important because modern life already moves quickly. Many people spend most of their year multitasking, checking notifications, and thinking ahead constantly. When you travel, it gives you a chance to break up that cycle. Simple routines help you to protect that feeling rather than turning your trip into another stressful schedule that you need to follow.

Conclusion

Travel routines are not about making trips predictable or boring, thereby creating stability and environments that constantly change. Small habits around your mornings, planning things like your food, and pacing yourself can help you to feel calm when you are traveling, rather than spending the whole trip reacting to stressful moments. You create more space where you’re able to enjoy where you’re actually visiting.

The best travel experiences often come from having a calming routine rather than having a strict schedule. They come from feeling present, comfortable, and open to the moment in front of you.

The “First Day in a New City” Routine for Solo Travellers

Arriving in a new city alone can feel equal parts exciting and overwhelming. The good news is that a simple, structured first-day routine can make the experience feel a lot more manageable. Getting your bearings early, setting a calm pace, and knowing what to prioritise are the three things that make the biggest difference.

In this article, we’ll break down the ideal first-day routine for solo travellers, including what to do when you arrive, how to orient yourself, and the key habits that keep your trip on track from day one.

solo traveller

What Should You Do on Your First Day in a New City?

The main priority on your first day as a solo traveller is orientation, not sightseeing. Here’s a straightforward structure to follow:

  • Arrive before dark if possible, so you can navigate more easily
  • Drop your bags and walk the immediate area around your accommodation
  • Identify key landmarks and transport routes near where you’re staying
  • Eat something local and take time to slow down
  • Do one low-pressure activity, such as a walking tour or a visit to a nearby park or market
  • Check in with someone back home and share your location or itinerary
  • Plan the next day loosely before you go to sleep

The key takeaway is this: day one is about settling in, not packing in as much as possible. The more grounded you feel in your surroundings, the better the rest of your trip will go.

Key Factors That Affect Your First Day Routine

Several factors shape what your first day actually looks like. Here’s what to consider before you arrive.

Arrival Time

Arriving in daylight makes everything simpler. You can read signage more easily, navigate public transport with less stress, and get a clearer sense of the neighbourhood around your accommodation. If something about your lodging doesn’t feel right, you’ll also have time to make alternative arrangements. In most cases, a mid-morning or early afternoon arrival gives you the best start.

Jet Lag and Travel Fatigue

If you’ve crossed multiple time zones or had a long travel day, your energy levels on arrival may be lower than expected. This matters when planning your first-day routine. Pushing through with a packed itinerary often leads to poor decisions and a slower recovery. We’ve made this mistake ourselves, arriving in a new city after a red-eye and immediately heading out to sightsee, only to spend the following day completely flat. If you’re crossing time zones, it’s worth having a plan for recovery before you land. Our jet lag recovery routine covers the steps that actually help you bounce back faster. A lighter first day, followed by a stronger second, generally leads to a better overall trip.

Type of Accommodation

Where you’re staying affects your first-day rhythm. Hostel common areas are often a good source of informal tips from other travellers, and many hostels run organised activities that take the pressure off planning. Hotel and apartment stays offer more privacy but require more independent navigation from the start. Either way, knowing your accommodation’s location relative to the city centre or key transit hubs before you arrive saves time.

Familiarity With the Destination

First-time visitors to a city generally benefit from a slower, more structured first day. If you’ve visited before, you may feel comfortable jumping straight into activities. This depends on the individual, but as a general rule, the less familiar the destination, the more valuable it is to build in downtime early on.

Safety Considerations

The level of caution required on your first day varies by destination. Researching the neighbourhoods around your accommodation in advance, knowing which areas to avoid at night, and having key contacts saved on your phone are all worth doing before you leave. These steps matter more in some cities than others, but they’re always worth the effort.

solo traveller

The First Day Routine: Step by Step

Here’s a practical structure that works well for most solo travellers arriving in an unfamiliar city.

Step 1: Get From the Arrival Point to Accommodation Without Complications

Before you travel, confirm exactly how you’re getting from the airport, train station, or bus terminal to your lodging. Know the name of the transit line, what the signage looks like, and approximately how long it takes. Download offline maps for your destination before departure so you’re not relying on data from the moment you land.

This single step removes the most common source of first-day stress. Arriving in a new city already knowing your route is a small thing that makes a large difference.

Step 2: Drop Your Bags and Walk the Immediate Area

Once you’ve checked in or left your luggage, spend 20 to 30 minutes walking the streets immediately around your accommodation. There’s no agenda here. The goal is simply to build a mental map of your immediate surroundings: where the nearest food options are, how the streets are laid out, and what the neighbourhood feels like at ground level.

This short walk is something we do instinctively now, but it took a few disorienting first days in unfamiliar cities to understand why it matters. Even 20 minutes on foot does more to settle you into a new place than any amount of map-studying before you arrive.

Step 3: Eat Something Before You Do Anything Else

Travel, even when things go smoothly, is physically draining. Before starting any planned activity, find somewhere to eat. Street food stalls, local cafes, and neighbourhood markets are often better choices than the first restaurant you see near a tourist landmark. Eating local food also gives you a quick entry point into the culture and pace of the place you’ve arrived in.

Step 4: Orient Yourself With a Walking Tour or Self-Guided Walk

One of the most effective things a solo traveller can do on day one is take a walking tour. Many cities offer pay-what-you-wish tours that run throughout the day. These cover key landmarks and historical context, and they’re a practical way to meet other travellers in a low-pressure setting. Platforms like GuruWalk let you search and book local tours in cities worldwide before you arrive.

If a guided tour doesn’t appeal, a self-guided walk using a basic map or a city guide app works just as well. The goal is to start connecting the places you’ve read about with the actual layout of the city.

Step 5: Identify One or Two Transit Routes You’ll Use Regularly

Understanding how to get around is one of the most practical things you can do on your first day. Study the transit map, identify the lines or routes you’re most likely to use, and if possible, test them in daylight before you need them. Knowing how the public transport system works reduces friction on every day that follows.

Step 6: Do One Low-Key Activity in the Afternoon

Rather than trying to visit multiple sites on day one, choose a single, low-pressure activity for the afternoon. A visit to a local market, a walk through a public park, or a browse through a neighbourhood you read about in advance all work well. The key factor here is keeping the first day manageable. One meaningful experience is more valuable than a rushed list of ticked-off sights.

Step 7: Eat Dinner Somewhere Calm and Plan Tomorrow

Solo dining is something many first-time solo travellers feel uncertain about. Counter seating, cafe-style restaurants, and spots that cater to solo diners make the experience much easier. Bringing a book, a journal, or a notebook to plan the next day removes any awkwardness and makes the time productive. Honestly, some of us have come to prefer eating alone when we’re travelling. There’s something about sitting at a counter with a good meal and nowhere else to be that’s hard to replicate.

Before you sleep, spend ten minutes sketching out a loose plan for day two. A rough structure for the morning is enough. One of the bigger challenges of solo travel is keeping any kind of consistent structure across multiple days in different places. If that’s something you find difficult, our guide on how to maintain your routine while traveling is worth a read alongside this one. And if you’re looking to build better daily structure from the ground up, our guide to building a daily routine that actually works applies just as well on the road as it does at home.

Step 8: Check In With Someone Back Home

Before you settle in for the night, let someone at home know you’ve arrived safely. Share your accommodation details, a rough outline of where you’ll be the next day, and a time when you’ll next be in touch. This is a simple safety habit that takes two minutes and provides peace of mind on both ends.

solo traveller

Habits Worth Building From Day One

Keep the First Day Light

The first day sets the tone for the rest of the trip. Arriving with an overloaded itinerary creates unnecessary pressure. In most cases, a relaxed first day leads to more enjoyment and better energy in the days that follow.

Carry a Physical Backup

A downloaded offline map, a written note of your accommodation address in the local language, and a copy of key booking confirmations are all worth having in a format that doesn’t require internet access. Signal drops, dead batteries, and unfamiliar app interfaces are all more likely on your first day in an unfamiliar city.

Use Public Transport From the Start

Getting familiar with public transport early in your trip saves money and builds confidence. Most transit apps are intuitive and work across cities worldwide. Testing a bus or metro route on day one, when there’s no time pressure, is much easier than figuring it out when you actually need to be somewhere.

Trust Your Instincts About Safety

If something doesn’t feel right, leave the situation. This applies to people, places, and routes. Solo travellers generally develop stronger situational awareness over time, but even on day one, instinct is usually reliable. Prioritising safety over politeness is always the right call.

Leave Space for the Unexpected

Some of the best experiences in solo travel come from brief, unplanned moments: a market you stumbled into, a side street lined with independent cafes, or a short conversation with someone at a coffee counter. Leaving space in the first day for the unexpected is a habit worth building early.

Where Day One Goes Wrong

Arriving After Dark Without a Clear Plan

Arriving at night in an unfamiliar city makes everything harder. Navigation is more difficult, and the ability to assess a neighbourhood or make changes to accommodation is significantly reduced. Where possible, plan arrivals for the morning or early afternoon.

Over-scheduling the First Day

Trying to visit five or six major attractions on arrival day is a common mistake. It often leads to rushing, decision fatigue, and a feeling that the trip is already off to a pressured start. One to two activities, done at a relaxed pace, is almost always a better approach.

Not Downloading Offline Maps Before You Arrive

Relying entirely on live data in a new city adds unnecessary risk. Signal is inconsistent in many destinations, and international data plans aren’t always reliable from the moment of arrival. Downloading the relevant area in Google Maps before you leave costs nothing and removes a significant potential source of stress.

Keeping Your Head in Your Phone

Navigation apps are useful, but spending the first day staring at a screen means missing what’s actually happening around you. Use your phone for specific navigation decisions, then look up. The way a city sounds, smells, and feels at street level is part of the experience that helps you understand where you are.

Telling Strangers Where You’re Staying

This is a basic but important safety habit. Your accommodation details are private information. Keeping your lodging as a personal safe zone, rather than something you share casually, is a sensible approach regardless of destination.

Keeping It Simple

The first day in a new city as a solo traveller doesn’t need to be ambitious. The most important thing it can be is calm, grounded, and well-structured.

Getting your bearings, eating well, taking one orientation activity, understanding how to get around, and building in time to simply observe the city you’ve arrived in are all more valuable on day one than a packed list of sights. The routine outlined here is designed to reduce the friction of arrival and set a stable foundation for everything that follows.

In most cases, solo travellers who give themselves a measured first day find that their confidence builds quickly from there. The city becomes familiar faster, decisions feel easier, and the experience becomes what it’s meant to be: something you’re genuinely present for.

Digital Nomad Daily Routine: How Remote Workers Structure Their Days Abroad

Most digital nomads don’t lack freedom. What they lack is structure. Without a consistent routine, the flexibility that makes working abroad so appealing can quickly turn into missed deadlines, decision fatigue, and a creeping inability to switch off. A well-designed digital nomad daily routine solves that.

According to MBO Partners’ 2025 Digital Nomad Report, there are now over 18 million Americans identifying as digital nomads, a number that’s grown by more than 147% since 2019. Yet most of the advice out there focuses on the destination, not the daily structure that actually makes the lifestyle work long-term.

In this article, we’ll break down what a realistic remote work schedule looks like when you’re living and working abroad, the key factors that shape it, and how to build habits that hold up no matter where you are.

digital nomad

The Shape of a Remote Work Day Abroad

A typical digital nomad daily routine isn’t a mirror image of a nine-to-five. It’s built around focused work blocks that travel with the person, not the place. Most remote workers working abroad settle into a pattern that looks something like this:

  • Morning: A consistent wake-up time, a brief anchor habit (exercise, journaling, or a simple coffee ritual), and a scan of the day’s priorities
  • Deep work block: Two to four hours of focused, high-priority output during peak mental energy
  • Midday break: Movement, a local meal, or time away from the screen
  • Secondary work block: Lighter tasks, email responses, and client calls timed around team availability
  • End-of-day shutdown: A clear stopping point that separates work from personal time
  • Evening: Exploration, rest, or social time depending on location and energy levels

The main factor here is that the structure travels with the person, not the place. Exact hours vary by individual, time zone, and employment type, but the overall shape of the day tends to stay consistent for those who thrive in this lifestyle.

Why No Two Digital Nomad Schedules Look the Same

Employment Type

Whether someone’s a freelancer, a full-time remote employee, or running their own business significantly affects how their workday is built.

Full-time remote employees generally work within hours defined by their employer, with scheduled meetings and team check-ins forming the calendar backbone. Their routine is shaped by workplace expectations first, with personal habits fitted around that structure.

Freelancers and self-employed nomads have more room to design their day around energy levels and output rather than clock time. That flexibility is a genuine advantage, but it also requires more self-discipline. Without external accountability, it’s easy for the workday to either expand indefinitely or quietly shrink.

When we looked into how different types of remote workers describe their days, the biggest gap wasn’t between time zones or locations. It was between those who’d deliberately built a routine and those who hadn’t.

Time Zone Alignment

Time zones are one of the most practical constraints on any remote work schedule when traveling. A nomad based in Southeast Asia working with clients in the US may find their deepest focus hours fall in the local morning, before anyone stateside comes online.

In most cases, experienced remote workers identify a two-to-three hour overlap window with their main team or clients and treat that window as non-negotiable. Everything else gets arranged around it. Building a schedule for working across time zones from scratch is one of the first things worth getting right.

Peak Energy Windows

Most people have a defined window of peak cognitive performance each day, typically two to four hours. For many, it lands in the morning, though that genuinely varies by individual.

The key factor here is identifying that window and protecting it for high-priority work. Lighter tasks like emails, scheduling, and admin work fit better in lower-energy periods, such as mid-afternoon. Trying to do deep creative or analytical work in that dip usually produces frustrating, low-quality output.

digital nomad

Location Stability

Moving cities every two weeks looks appealing from the outside, but it quietly drains a lot of time and mental bandwidth. Settling into a new area means figuring out transport, finding reliable coworking spaces or cafes with decent WiFi, and rebuilding the small logistical decisions that allow a day to run on autopilot.

According to MBO Partners’ data, the average digital nomad now spends around 6.4 weeks per location, up from 5.4 weeks in 2023. That shift toward slower travel reflects what many experienced nomads have learned the hard way: staying longer in fewer places generally produces better workdays and a richer experience of the destination.

Work-Life Separation

Without a commute to mark the start and end of the workday, remote workers abroad often find the boundaries between work time and personal time slowly erode. It starts with answering one email after dinner, then checking messages before bed, and before long the workday doesn’t really end.

Experienced nomads build a consistent shutdown ritual, whether that’s closing the laptop at a set time, leaving the coworking space, or doing a brief end-of-day task review. It doesn’t need to be elaborate. It just needs to be consistent.

How to Build a Routine That Holds Up on the Road

Start with two or three anchor habits, not a full schedule. Rather than trying to replicate a rigid office structure in a new country, identify a small number of non-negotiable habits that ground your day. A morning walk, a daily planning session, or a consistent start time can provide continuity even when your surroundings change completely. Building a daily routine from scratch follows the same principle whether you’re at home or working abroad: start simple and add from there.

Protect your peak focus window. Identify when your thinking is clearest and reserve that time for the work that requires the most concentration. Treat it the way a meeting gets treated on a calendar. That two-to-four hour block is often where the bulk of a day’s meaningful output actually comes from.

Plan tomorrow the night before. Writing out your top three to five priorities the evening before removes decision fatigue first thing in the morning. It also means you’re starting the day with direction rather than spending the first hour figuring out what needs to happen.

Batch lighter tasks. Grouping emails, scheduling, and admin into defined time slots keeps interruptions out of focused work periods. Responding reactively throughout the day fragments attention in ways that compound across a week.

Build in a buffer day after travel. Arriving somewhere new and immediately trying to work a full schedule rarely goes well. Factoring in a lower-demand day after any significant journey makes it easier to settle in and get back to a reliable routine more quickly.

Set clear availability for clients and colleagues. Including your current time zone in email signatures or project management tools sets realistic expectations and prevents the kind of missed-connection frustration that erodes working relationships over time.

Where Most Remote Workers Go Wrong When Working Abroad

Trying to work full-time and travel like a tourist at the same time. This is probably the most consistent pattern we came across when researching how nomads describe burning out. Attempting to output a full workload while also exploring every corner of a new city leads to neither being done properly. Days feel full but unproductive. Structuring work time and personal time as genuinely separate tends to make both more satisfying.

Moving too frequently. The version of nomad life that involves a new country every week tends to exist mainly on social media. In practice, frequent relocation generates constant logistical overhead: finding workspaces, adjusting to new WiFi situations, and re-making the micro-decisions that let a routine run on autopilot. Four to six weeks in one location is a more practical minimum for anyone trying to maintain real output.

Picking accommodation for aesthetics over function. A beautiful apartment with unreliable internet can undo an entire workday. Verifying connection speeds and identifying nearby coworking space options before committing to a place is one of those unglamorous steps that pays off fast. Some destinations add an extra layer to this: if China is on your itinerary, access to familiar tools and platforms is restricted by default, so sorting a reliable VPN for China before you arrive is as important as checking the WiFi speed. According to one survey of digital nomad habits, decision fatigue from constantly rebuilding logistics is one of the most commonly cited productivity drains in the lifestyle.

Letting time zone misalignment disrupt sleep. Scheduling calls that regularly fall late at night because of client time zone differences disrupts sleep quality in ways that stack up quickly. Where possible, being transparent with clients or teams about working hours and building those boundaries in early protects both performance and wellbeing.

Skipping the end-of-day shutdown. Without a physical cue like leaving an office, it’s easy to keep half-working past the point of genuine productivity. A shutdown ritual, however brief, does real work in separating the day. Even something as simple as a short walk and closing all work apps creates enough of a break to make the evening feel like actual downtime.

digital nomad

The Routine That Travels With You

A digital nomad daily routine doesn’t need to be elaborate or rigidly scheduled to be effective. The goal is a consistent structure that adapts to new environments without collapsing under them.

The key takeaway is this: the most sustainable remote work schedules are built around a few non-negotiable habits rather than a fixed hour-by-hour timetable. Know when you work best, protect that time, and create a clear boundary between work and the rest of your day. That structure holds whether you’re working from Lisbon, Chiang Mai, or Buenos Aires.

For most people, it takes a few weeks of adjustment to find a rhythm that works. Starting with the basics, a consistent start time, a clear shutdown routine, and a reliable workspace, gives you a foundation worth refining. The specifics can change with every new city. The shape of the day doesn’t have to.

The Pre-Travel Routine: How to Prepare for a Trip Without Stress

A well-structured pre-travel routine can make the difference between arriving at your destination feeling calm and arriving feeling frantic. Most travel stress comes from leaving too many tasks until the last minute, not from travel itself. By spreading preparation across a simple timeline, the process becomes manageable rather than overwhelming.

In this article, we’ll break down the key factors that affect pre-trip stress, a practical week-by-week routine to follow, and the pitfalls worth knowing before your next trip.

How to Prepare for a Trip Without Stress

The most effective way to prepare for a trip without stress is to start early and work through tasks in stages rather than all at once.

Here’s a simple overview:

  • 2 to 4 weeks out: Handle documents, insurance, and any health-related admin
  • 1 week out: Begin packing, confirm bookings, sort home prep tasks
  • 2 to 3 days out: Finalize packing, charge devices, handle finances
  • The night before: Lay out travel-day items, get to bed at a reasonable time
  • Morning of: Run a final check, give yourself extra time

The key takeaway is that pre-travel stress is largely preventable. A routine that breaks tasks into smaller steps across several weeks removes the pressure of last-minute scrambling.

packing for a trip

Key Factors That Affect Pre-Travel Stress

Pre-travel stress isn’t the same for every trip or every traveler. Several factors influence how much preparation a given trip requires.

How Far in Advance You Start

Starting early is one of the most consistent factors in a stress-free preparation process. Most travel experts and frequent travelers recommend beginning at least two to four weeks before departure for domestic trips, and up to two months out for international travel.

When preparation is compressed into the final 24 to 48 hours, small tasks that would otherwise take minutes begin to stack up. Documents are harder to locate, last-minute purchases are more expensive, and the mental load increases significantly.

The Complexity of the Trip

A weekend road trip requires far less preparation than a two-week international itinerary. The key factor here is the number of moving parts. Multi-destination trips, group travel, international entry requirements, and trips involving children or pets all add layers of preparation that benefit from earlier planning.

For shorter, simpler trips, a condensed version of the same routine still applies. Even a one-night stay benefits from a brief checklist to avoid forgetting essentials.

Your Existing Daily Routines

People who already operate with structured daily routines tend to find pre-travel prep less disruptive. That’s because routine-based habits, such as tracking what you use each morning, make it easier to build an accurate packing list and identify what’d be missed on a trip.

If your routines are less structured, it can help to spend a few days before packing simply noting what you reach for daily. Health supplements, chargers, skincare, and medications are commonly forgotten because they’re so habitual they go unnoticed. For guidance on building those habits before you travel, it’s worth reading through how to build a daily routine.

Home and Work Responsibilities

Pre-trip preparation extends beyond personal packing. Arranging care for pets, pausing deliveries, setting an out-of-office reply, and clearing out perishables from the fridge are all tasks that contribute to peace of mind during the trip itself.

Leaving home-side responsibilities unresolved is one of the most common causes of low-level travel anxiety. Addressing these tasks early means they’re not running in the background once you depart.

The Pre-Travel Routine: A Week-by-Week Breakdown

A practical pre-travel routine doesn’t require an elaborate system. The goal is to distribute tasks across a sensible timeline so that nothing urgent is left for departure day.

2 to 4 Weeks Before Departure

This stage is focused on logistics and admin. These are tasks with the longest lead times, and leaving them too late can create genuine problems.

Documents and entry requirements

Check that your passport is valid. Many countries require at least six months of validity beyond your return date, and some airlines won’t allow boarding if that requirement isn’t met. If a visa is required, begin that process as soon as possible, as processing times vary widely.

For domestic trips, confirm that any required ID is current and readily accessible.

travel documents

Travel insurance and health prep

If you plan to purchase travel insurance, do so early. Review any health-related considerations for your destination, including required or recommended vaccinations, and refill any prescription medications with enough supply to cover the trip plus a buffer.

Bookings and confirmations

Confirm all major bookings, including flights, accommodation, and any car rentals or transfers. Save confirmation numbers in one accessible place, whether that’s a notes app, a travel folder in your email, or a printed document.

1 Week Before Departure

This stage shifts from logistics to practicalities. Most of the following tasks take less time than expected but are frequently deferred until too close to departure.

Start your packing list

Rather than packing all at once, begin a working list. A useful approach is to note items as you use them during your regular daily routine throughout the week. This helps capture the small things, including chargers, medications, and daily-use products, that are easy to overlook when packing from memory alone.

If you’re flying carry-on only, keep the TSA’s 3-1-1 liquids rule in mind as you plan your toiletries. Each liquid or gel must be 3.4 oz (100ml) or less, all fitting into one quart-sized clear bag.

Notify your bank

If traveling internationally, let your bank and credit card providers know. Some cards still flag overseas transactions as fraud. Checking foreign transaction fees in advance can also help you decide which cards to use on the trip.

Sort home prep tasks

Arrange for mail to be paused or collected, book pet care if needed, and plan what to do with any perishables in the fridge. Let a trusted neighbor or contact know you’ll be away and share relevant details if appropriate.

If you’re taking time off work, set your out-of-office message, complete or delegate any pending tasks, and communicate your availability expectations before you leave.

2 to 3 Days Before Departure

This is where preparation moves into its final stage. Most of the logistical groundwork is already done; the focus here is on physical readiness and final checks.

Pack in full

Use a category-based approach to packing rather than adding items randomly. Common categories include travel day essentials, clothing by day or activity, toiletries, tech and chargers, documents and wallet items, and any medications or supplements.

Packing full outfits rather than individual pieces helps reduce both overpacking and the daily decision fatigue of figuring out what to wear while traveling.

Charge all devices

Charge your phone, laptop, e-reader, portable battery, and any other electronics. Download any maps, shows, podcasts, or reading material you want available offline. Check that any travel apps, boarding pass apps, or booking platforms are updated and functioning.

Prepare your finances

If your destination uses a different currency and you’d like cash on hand, arrange this before departure rather than relying on airport exchange rates, which are generally less favorable. Confirm that you’ve got backup payment options available.

The Night Before Departure

The night before isn’t the time to begin packing. Ideally, everything’s already done. This stage is about final review and physical preparation.

Run a final check

Go through your packing list one more time and check that your travel documents, phone, wallet, and keys are in an easily accessible place for the morning. If you’re flying, check in online if you haven’t done so already.

Prepare for departure day

Lay out your travel-day outfit, any carry-on essentials, and your bag by the door. This eliminates a surprising amount of morning friction.

Take out any remaining trash, empty the fridge of anything that won’t keep, and make sure the home is tidy. Coming home to a clean space after a trip is a commonly underrated form of self-care.

Prioritize sleep

Pre-departure excitement can make it harder to wind down, but getting adequate rest before travel significantly improves the experience. A standard wind-down routine works well here: avoid screens close to bedtime, keep the room cool, and give yourself enough time to get a full night of sleep based on your departure time.

Morning of Departure

Give yourself more time than you think you need. Most travel-day stress is caused by underestimating how long it takes to get out the door.

Run through a brief mental check: documents, wallet, phone, keys, bag. Lock up, set any security systems, and leave with enough buffer time that small delays don’t become a problem.

Travel Prep Pitfalls Worth Knowing

Leaving packing until the night before

Packing the night before a departure is one of the most reliable sources of pre-trip stress. Items are forgotten, laundry may not be done, and decisions that would take seconds with a clear head take much longer under time pressure.

Forgetting to sort home logistics

Many travelers focus entirely on what they’re taking and overlook what needs to happen at home. Pausing mail, arranging pet care, setting lights on timers, and handling bills due during the trip are all tasks that create ongoing anxiety if they’re not addressed before departure.

Overpacking to reduce uncertainty

The instinct to overpack is generally driven by uncertainty. Planning outfits in advance and researching the destination’s climate and activities reduces the temptation to bring “just in case” items that add weight without adding value.

Relying on airport or destination exchange rates

For international travel, exchanging currency at the airport or arriving without a plan for local payment often results in higher fees or inconvenient situations. Checking this in advance takes minimal time and prevents unnecessary friction.

Skipping rest before a long journey

Sleep is frequently deprioritized in the final days before a trip. This is worth resisting. Fatigue compounds the low-level stress that comes with airports, logistics, and unfamiliar environments. Treating the night before travel as part of the routine, rather than an extension of last-minute prep, generally leads to a smoother departure.

Putting It All Together

A strong pre-travel routine is less about rigid checklists and more about distributing tasks early enough that nothing becomes urgent. In most cases, the stress associated with travel preparation is the result of compressed timelines rather than the complexity of the tasks themselves.

Start with documents and logistics, work through home prep and packing during the week before departure, and use the night before to rest and reset rather than rush. The key takeaway is simple: the more of your preparation is done before the final 48 hours, the calmer the departure day tends to be.

With a consistent approach, pre-travel preparation can shift from a source of stress to a reliable part of the travel experience itself.