Hobbies Archives - RoutineBase

Bill Gates’s Reading Routine: How He Actually Reads 50 Books a Year

Yes, it’s true: Bill Gates reads about 50 books a year, roughly one a week, and he’s said so consistently since telling the New York Times in 2016 that reading is “the main way that I both learn new things and test my understanding.” Nearly a decade later, he’s still at it. But the number is the least useful part of the story. What actually makes it repeatable is a short list of specific, almost boring habits: how long he sits down for, what format he reads in, and when he decides a book is worth notes.

bill gates reading routine

The Habit Behind the Number

Gates has told the same basic story to the New York Times, Time, and Quartz over the years, and it hasn’t changed much. He reads mostly nonfiction: biography, history, science, public health, and the occasional novel his wife or a friend hands him. He picks up a book expecting to learn something, not just to relax, though he’s said reading before bed also helps him wind down.

What’s easy to miss in the “50 books” headline is that this isn’t a sprint he does once a year. It’s a weekly baseline he’s maintained since at least the mid-2010s, through running Microsoft, launching a foundation, a divorce, and turning 70. The habit outlasted the job.

The Four Rules That Actually Do the Work

In a widely cited 2017 Quartz interview, Gates laid out four specific habits that let him get through that much material without it feeling like homework.

He blocks at least an hour, not fifteen-minute chunks. Gates has said that with a book, especially nonfiction, he wants to sit down for an hour at a stretch. Shorter content like articles or videos fits into small gaps in the day; a book, in his view, doesn’t.

He reads on paper, not a screen. This is partly about focus and partly about the notes (see below). A physical book is harder to swipe away from than a tab.

He finishes what he starts, on principle. Gates has said he refuses to abandon a book partway through, even ones he actively dislikes, citing his years-long standoff with the 1,000-plus-page “Infinite Jest” as the extreme example. The more he disagrees with an author, the longer the book takes him, because he stops to argue in the margins.

He takes notes, but only on some books. This is the detail most articles about Gates and reading leave out. He’s said directly that he only writes notes on roughly one in five of the books he reads, doubling the time those particular books take. Notes aren’t a blanket rule; they’re reserved for the books he wants to actually retain or argue with. For everything else, he just reads.

That last point matters because it’s the opposite of what most “read like a billionaire” advice implies. Gates isn’t annotating every page of every book. He’s decided in advance which books earn that effort and let the rest be lighter reading.

What “50 Books a Year” Actually Requires

Most coverage repeats the 50-books figure without ever translating it into something you can act on. Here’s the math, using an average nonfiction book at roughly 300 pages.

Fifty books a year works out to about 41 pages a day, or close to 300 pages a week. How long that takes depends entirely on your reading speed, which varies a lot more by book than most people assume: a breezy memoir reads faster than a dense policy book, regardless of who’s reading it.

Your rough pace Time to read 41 pages What that gets you over a year
20–25 pages an hour (dense or unfamiliar material) About 100 minutes a day Roughly 30–35 books
35–40 pages an hour (typical adult pace on an average nonfiction book) About an hour a day Close to 50 books
50–60 pages an hour (fast reader or a page-turner) 40–45 minutes a day 55–65+ books

That middle row is worth noticing: at an ordinary reading pace, hitting Gates’s number takes almost exactly the “at least an hour” block he already builds into his rule. The math backs up the habit. It also means 50 books a year isn’t really about reading unusually fast; it’s about reading for roughly an hour a day, most days, for a full year. One of our team clocked their own pace on a typical nonfiction book recently and landed at about 35 pages an hour, which lined up almost exactly with this table before we’d built it.

If an hour a day sounds like more than your week can absorb, the target can flex without losing the habit. Twenty books a year is a book every two and a half weeks, at roughly 25 minutes a day. Twelve is a book a month. The specific number matters far less than whether the daily block actually happens.

“Think Week” Is a Different Habit, and People Mix the Two Up

A lot of the content about Gates and reading blends his personal 50-books-a-year habit with his “Think Week,” and they’re not the same thing. Think Week was a twice-yearly, week-long retreat Gates took to a cabin in the Pacific Northwest during his years running Microsoft, where he’d read dozens of internal papers and memos from employees, sometimes for most of the day, and send feedback afterward. It shaped real decisions, including Microsoft’s early push into the internet in the 1990s.

That’s a work practice built around technical documents and strategy, done alone, twice a year. His 50-books habit is a daily reading practice built around nonfiction and memoir, done at home, most nights. Both involve a lot of reading. Only one of them is realistic to borrow for an ordinary week, and it’s the daily one, not the cabin retreat.

When He Actually Reads

Gates has said his evenings usually include at least an hour of reading before he goes to sleep, separate from work. On vacation, that expands considerably: he told a Reddit AMA that he gets through about three hours of reading a day when he’s away, which is part of why he’s known for packing a tote bag of books on trips.

He also treats reading as something worth checking in on publicly. Twice a year, he posts a short list of five books on his blog, Gates Notes, once for summer and once around the winter holidays, along with a few lines on why each one stuck with him. It functions less like a top-ten list and more like a periodic review of what he’s actually gotten out of his reading, which is a habit worth stealing even without the audience.

A Scaled-Down Version You Could Actually Keep

Most people don’t need Gates’s specific rules; they need a version sized to an actual week. Here’s what that looks like, built from the habits above.

  • Pick one book at a time. Gates reads one at a time rather than juggling several, which removes the “which one was I on again” friction that kills a lot of reading habits before they start.
  • Protect a smaller block than an hour. Twenty to thirty minutes, same time each day, beats an hour you can’t consistently find. Right after dinner or during a commute both work.
  • Decide your note-taking rule ahead of time, not mid-book. Following Gates’s own ratio, save notes for the one book in five you actually want to remember or argue with. Everything else can just be read.
  • Give yourself permission to abandon a book. This is the one rule of Gates’s worth skipping. His “always finish” habit works for someone who’s already fast and selective about what he starts. For most people, forcing through a book you’re not getting anything from is exactly the kind of friction that ends the habit altogether.

One of our team tried the full hour-before-bed version for a week, the way Gates describes it, and found it pushed their actual lights-out time later than planned most nights. Twenty minutes right after dinner, before phones came out, turned out to be the version that actually lasted past the first week.

Questions Readers Ask About Gates’s Reading Habit

How many books does Bill Gates read a year? About 50, a figure he’s repeated in interviews from 2016 through his more recent public comments, working out to roughly one book a week.

Does Bill Gates read fiction, or only nonfiction? Mostly nonfiction, covering topics like public health, biography, history, and technology, but his twice-yearly reading lists usually include at least one or two novels or memoirs.

What time of day does Bill Gates read? Mainly in the evening, for at least an hour before bed. On vacation, he reads considerably more, up to three hours a day by his own account.

What is Bill Gates’s “Think Week”? A separate, twice-yearly retreat he took during his Microsoft years to read internal strategy papers and memos in isolation. It’s a work practice, distinct from his personal 50-books-a-year reading habit.

Start With the Block, Not the Number

The specific habit worth copying isn’t “read 50 books.” It’s “read for a set block of time, most days, and only take notes on what deserves it.” Pick a block your actual evening can hold, even if it’s a third of Gates’s hour, and let the book count take care of itself. If you want a simple way to see whether the habit is sticking, our daily routine template already has a column built for tracking pages read, which is a lighter lift than counting finished books until the habit is a few months old.

20 Minutes a Day: A Simple Golf Practice Routine for Amateurs

Most amateur golfers practice the same way they diet. Nothing for three weeks, then a punishing four-hour session at the range on a Saturday, then nothing again. The bucket gets emptied, the hands get sore, and the score on Sunday looks exactly like it did last month.

The fix is not more practice. It is a smaller practice, repeated. Twenty minutes a day, most days, will beat one long-range session every time. Here is what those twenty minutes should actually contain.

golf practice

Why short and daily beats long and occasional

The average 18-hole score in the United States sits at around 94, and the average Handicap Index is 14.2 for men and 28.7 for women, according to figures the USGA publishes alongside National Golf Foundation participation data. That average has barely moved in decades, despite equipment getting dramatically better. Something about how people practice is not working.

Part of the problem is that a long session flatters you. The first fifty balls are useful. The next stretch is you getting tired and grooving to a swing that is falling apart in front of you. Fatigue turns practice into a repetition of your worst habits. 

A hundred balls hit across five short sessions is worth more than a hundred balls hit in one go. Same effort. Better swings, because none of them are tired ones.

There is a practical benefit too. Twenty minutes fits into a real week. Four hours does not work, which is why the four-hour session keeps getting cancelled.

Make the routine impossible to skip

The routine is not the hard part. Showing up is.

Attach the practice to something you already do without thinking, so the trigger remembers you. The putting mat comes out after you close the laptop. A wedge session happens while the oven preheats. You are not relying on motivation you may not have on a Wednesday night.

Friction matters just as much. If your clubs live in the boot of the car under a bag of recycling, you will not practice. Leave the putter and one wedge somewhere visible.

Equipment plays a quieter role than most people admit. New gear is not required to practice, but a golfer does need clubs that they are willing to pick up. If a set is a patchwork of hand-me-downs with mismatched shafts and grips that have gone slick, it is worth spending one afternoon to consider used golf clubs from top brands and build a consistent set at a sane price. Practicing with clubs that behave predictably makes the twenty minutes actually mean something. Practicing with a wedge you hate means the game quietly gets abandoned. 

What goes into the twenty minutes

You do not need a range membership. Most of this works in a garden, a garage, a hallway, or a corner of a car park with a net.

Split the time like this:

  • 5 minutes: putting from 3 to 6 feet. The distance that decides whether a bogey becomes a double.
  • 5 minutes: chipping to a target. Any target. A towel on the grass works.
  • 5 minutes: half swings with a wedge or 9-iron, focused on contact rather than distance.
  • 5 minutes: full swings, but slowly, and only if you have the space. If you do not, spend it on grip and setup checks in front of a mirror.

Notice how little of that is full-swing work. That is deliberate. Amateurs spend most of their practice time on the shot that accounts for a small fraction of their strokes, then wonder why they still three-putt.

If you only ever do the first ten minutes, you will still shoot lower.

Practice the way you play

Here is where most short sessions go wrong. People hit twenty identical putts from the same spot, watch them all drop, and feel good about themselves. Then they miss the first one on the course.

That is blocked practice, and it flatters you. Research on random versus blocked practice in golf putting found that golfers who practiced in a random order putted worse during the practice itself but retained more a week later and developed a mental picture of the stroke that looked closer to that of skilled players. The blocked group performed better in the moment and learned less.

The lesson is uncomfortable but simple. Make your practice feel harder than it needs to.

  • Never hit the same putt twice in a row. Move the ball every time.
  • Change clubs between chips instead of running through ten shots with the same wedge.
  • Give each shot a target and a consequence. Miss the towel, start the count again.

You will feel worse during the session. That is the point. The feeling of competence at the range is not the same thing as competence on the course.

golf practice

Track something, but only one thing

A twenty-minute routine dies the moment it turns into an admin project. You do not need a spreadsheet, a launch monitor, or a subscription.

Pick one number and write it down. Putts made from six feet out of ten. Chips are inside a club, rated out of ten. That is it. One number, once a day, tracked on your phone.

Log it at the same point every time, ideally bolted onto something that already happens without thought, like making your evening coffee. This is habit stacking in its simplest form, and it is the difference between a tracker you keep for a week and one you still have in October.

The value is not the data. The number provides a reason to open and close the session, along with honest evidence months later that the small sessions were effective.

When twenty minutes is not available

Some days it will not be. Work runs long, the kids need something, and the weather is doing what it does.

On those days, just do five. Ten putts from four feet, then stop. This is the logic behind five-minute microroutines. The short version exists to protect the habit, not to build the skill. A five-minute session keeps the chain intact so that tomorrow’s twenty-minute session still feels like the normal thing to do rather than a restart.

Protecting that chain matters more than it sounds, because the gaps between sessions are doing real work. Motor learning research on spaced versus massed skill learning has looked specifically at whether spreading practice across days produces longer-lasting learning than cramming it into one block, and the spacing effect is one of the better-established findings in skill acquisition. Your brain consolidates movement between sessions, not during them. Sleep does a chunk of the work for you.

Missing one day costs nothing. Missing four in a row is how routines quietly end.

The realistic outcome

Twenty minutes a day will not turn a 20 handicap into a scratch player by autumn. Nobody sensible is claiming that, though. What it will do is remove the strokes you are currently giving away for free, the thinned chip, the three-putt from twelve feet, and the flinch off the first tee because you have not touched a club in a fortnight.

Those strokes add up quickly, and they are the cheapest ones on the course to reclaim. Most days, spend twenty minutes with the clubs kept where you can reach them. That is the whole routine.


Building a Daily Golf Routine That Fits a Busy Schedule

Most golfers do not lose their game to a lack of talent. They lose it to a calendar. Work runs long, family commitments fill the evenings, and the driving range visit gets pushed to a weekend that never quite arrives. The result is a slow decline that feels unfair, because the intention was always there.

The fix is not more free time. It is a routine small enough to survive a bad week.

Why Golf Practice Is the First Thing to Disappear

Golf has an unusual problem compared to other hobbies. It carries a high activation cost. Before you hit a single ball, you have to change, drive somewhere, pay for a bay or a bucket, and warm up. That overhead can easily double the length of the actual practice.

When a routine requires forty minutes of logistics for thirty minutes of value, it stops being a routine and becomes an event. Events get cancelled. Habits do not.

So the first question is not how much you should practise. It is how much friction sits between you and your first swing.

Shrink the Session Until It Cannot Be Skipped

A busy golfer’s instinct is to wait for a two-hour window. That window rarely arrives, and when it does, fatigue often ruins it.

The alternative is to work in blocks short enough that, with micro-routines built around five-minute habits, no week can crowd them out. Five minutes is almost impossible to argue with: five minutes of putting on a carpet, five minutes of wedge rehearsals, five minutes of tempo drills with a weighted club. 

Removing the travel element matters just as much as shortening the session. This is where home practice makes a difference. A golf simulator for home practice turns a ninety-minute outing into a twenty-minute one, because the drive, the queue, and the bucket of balls all disappear. The same principle applies to a putting mat, a net in the garage, or a mirror in the hallway. What matters is that the equipment is already set up when you walk past it.

Practice that lives in your house gets used. Practice, which lives across town, gets postponed.

Anchor Practice to Something You Already Do

The most reliable way to protect a new habit is to attach it to an existing one. This is the same principle behind habit stacking, where a new behaviour is triggered by a stable cue rather than by motivation.

For golf, that might look like:

  • Ten minutes of putting, after the evening dishes are done
  • A short mirror or slow-motion swing check straight after your morning coffee
  • Grip and setup work while the kettle boils

The cue remembers you. It also helps to be realistic about the timeline. Dr. Phillippa Lally, whose research produced the widely quoted 66-day figure, has since pointed out that the time it takes to form a habit is highly variable, ranging from under three weeks to well over eight months, depending on the person and the behaviour. You are not building a golf habit in a fortnight, and a couple of missed days will not undo the work. 

Practise the Way the Course Actually Plays

Short sessions only pay off if the content is right. Most amateurs default to blocked practice, hitting the same club to the same target over and over. It feels productive because the shots get better as you go.

The problem is that improvement during a session is not the same as improvement that lasts. Work published in the International Journal of Golf Science notes that moving beyond repetitive blocked practice is central to performing better under pressure, particularly for players who already have some skill. Varied practice tends to feel worse in the moment and hold up better later. 

In practical terms, this means varying the task instead of repeating the same shot: 

  • Change the target and distance with every shot rather than every ten
  • Alternate clubs instead of working through the bag in order
  • Play imaginary holes, hitting a driver, then a mid-iron, then a wedge

You will hit worse shots during practice. But you’ll transfer far more of your improvement to the course, which is the only place it truly counts. 

golf

Keep the Body Ready Between Sessions

A golf routine that ignores the body eventually becomes a physiotherapy routine. The swing asks for rotation through the thoracic spine, hips that can turn without the lower back compensating, and shoulders with enough range to finish the follow-through.

None of that requires a gym membership. It requires consistency. The World Health Organization recommends that adults do muscle-strengthening activity on at least two days a week alongside regular aerobic activity, which is a reasonable floor for anyone who wants to swing a club at pace into their fifties and beyond. 

Ten minutes of mobility work in the evening does more for your ball striking than most golfers expect. Hip rotations, thoracic openers, and a few slow lunges are enough. Tie it to an existing wind-down habit, and it will stick.

Build the Week Around Fixed Slots

Once the individual habits exist, the last step is to give them a shape. A workable week for a busy golfer might look like this:

  • Monday to Friday: ten minutes of putting or short-game work most evenings
  • Two mornings: a short mobility session
  • One weekday: twenty to thirty minutes of full-swing practice at home
  • Weekend: one longer session or a round, when the diary allows

The point of writing it down is not rigidity. It is to remove the decision. Deciding what to practise is a task in itself, and after a long day, the brain will happily choose nothing over something.

Treat the weekday blocks as the routine and the weekend round as the reward. Most golfers do the opposite, which is why their game is inconsistent.

Accept That Some Weeks Will Break

Every routine faces a week it cannot survive. A deadline arrives, a child falls ill, and travel consumes the evenings. The golfers who keep improving are not the ones who never miss. They are the ones who return without treating the gap as a failure.

Keep a minimum version of the routine for those weeks. Two minutes of putting. One set of mobility drills. The goal during a hard week is not progress. It is keeping the habit alive so that it is still there when the pressure lifts.

A daily golf routine does not need to be ambitious to work. It needs to be small enough to survive your real life, specific enough that you never have to think about it, and close enough at hand that starting takes less effort than skipping. Get those three things right, and the improvement will look after itself.

Complete Guide to Wood Engraving for Beginners at Home

Transforming a plain piece of wood into a custom piece of art brings immense satisfaction. You can easily start this rewarding hobby at home without any prior woodworking experience. Wood crafting allows you to express your personal style while creating unique items for your family.

This guide shows you exactly how to begin your crafting projects safely and successfully. You will learn about the necessary equipment, proper wood choices, and basic design transfer methods. Discovering a creative outlet helps you unwind and sparks fresh inspiration for future handmade gifts.

wood engraving

Select Your Core Equipment

Your Tool Options

You need the right gear to ensure an easy wood engraving experience. Beginners often feel overwhelmed by the vast array of power tools available today. A compact rotary tool or a lightweight pen provides the best control for detailed lines.

Essential Safety Equipment

Safety always comes first when you carve or sand wooden items. Small particles fly into the air during the engraving process. You must wear clear protective goggles and a comfortable dust mask.

  • Eye Protection: Wear approved safety glasses to guard against flying wood splinters.
  • Respiratory Health: Use a tight-fitting dust mask to prevent inhaling fine wood dust.
  • Workspace Lighting: Position a bright desk lamp over your project to avoid eye strain.

Prepare Your Wood Workspace

Choose the Right Wood Species

Softwoods and hardwoods react differently to your engraving tools. Beginners achieve the best results by selecting uniform, light-colored wood surfaces. Basswood and pine offer smooth textures that allow your tool to glide effortlessly.

Surface Preparation Steps

You cannot skip the preparation phase if you want clean lines. Rough surfaces cause your tool to slip, ruining your detailed patterns. You can fix this by thoroughly sanding the wood surface.

  • Initial Sanding: Use medium-grit sandpaper to remove rough patches and manufacturing marks.
  • Final Smoothing: Switch to fine-grit sandpaper to create an incredibly sleek surface.
  • Debris Removal: Wipe the wood clean with a soft cloth to remove any loose dust.

Set Up Your Station

A stable work area prevents accidents and improves your overall accuracy. Secure your wooden block to the table using small clamps. This setup keeps your hands free to guide the engraving tool safely.

Master Design Transfer Techniques

Use Carbon Transfer Paper

Transferring a template onto your wood ensures you stay on track. You do not need elite drawing skills to create beautiful patterns. Carbon paper offers a simple way to move any printed design onto your workspace.

  • Template Selection: Print your chosen design on standard paper using clean black outlines.
  • Paper Layering: Place the dark carbon sheet directly onto the prepared wood surface.
  • Pattern Tracing: Use a ballpoint pen to trace over the lines firmly.

Direct Freehand Drawing

You can draw directly onto the wood if you prefer unique designs. Use a soft graphite pencil for your initial sketches. This approach allows you to erase mistakes easily before you activate your tool.

Execute Your Easy Wood Engraving

Handle Your Tool Safely

Holding your tool correctly prevents hand fatigue during long crafting sessions. Grip the device firmly near the tip like a thick writing pen. Keep your wrist flexible to navigate smooth curves without jerky movements.

Refine Your Carving Technique

You should practice on scrap pieces before touching your main project. Let the motor do the work instead of pushing hard.

  • Tool Angling: Hold your device at a consistent angle to maintain uniform depth.
  • Speed Control: Use a medium speed setting to prevent scorching the wooden fibers.
  • Line Creation: Pull the tool toward your body rather than pushing it away.

Proven Crafting Brands

Using reliable tools changes your entire crafting experience. More than 650,000 people use the flagship Customizer Engraving Pen from Resparked to create their custom items. The brand holds an Excellent community rating based on 2,493 reviews.

Finish and Protect Your Project

Clean the Carved Grooves

Wood dust accumulates inside your fresh lines as you work. You must clean these grooves before applying any protective coatings. A stiff nylon brush removes these trapped particles without scratching your design.

Apply Protective Finishes

A good finish protects your hard work from moisture and daily wear. Clear sealants highlight the natural beauty of the wood grain beautifully. You can apply these coatings using a soft brush or a clean cloth.

  • Mineral Oil: Apply food-safe oil if you engrave cutting boards or kitchen utensils.
  • Clear Acrylic: Spray a thin layer of acrylic sealer for decorative wall plaques.
  • Natural Beeswax: Rub warm beeswax into the grain for a soft matte appearance.

Conclusion

Engraving wood at home offers a fantastic way to develop your creative talents. You can master the basic techniques quickly with patience and the right setup. Every project teaches you something new about handling materials and refining your personal style.

Start with simple shapes before moving on to complex holiday gifts or custom signs. Your dedication to learning this craft will result in beautiful pieces you can share proudly. Gather your supplies, prepare your space, and enjoy making your first handmade wooden masterpiece.

How to Learn Spanish Through Music: Building a Daily Language Routine That Actually Sticks

The most sustainable way to learn Spanish through music is to treat songs as your primary listening material, not a supplement. Pick artists you actually like, work through their lyrics deliberately, and build music into daily moments you already have: commuting, cooking, winding down at night. That’s the whole framework.

Music-based Spanish learning works because it solves the two things that kill most language routines: boredom and forgetting. Songs create emotional and rhythmic memory hooks that flashcards can’t replicate, and they’re easy to fit into gaps you already have in your day.

Here’s how to structure a daily music routine that actually builds your Spanish, what the science says about why singing and listening work, and where most people’s music-based practice quietly breaks down.

learn spanish

What a Music-Based Spanish Habit Actually Looks Like

A working routine doesn’t require a separate study block. In practice, it comes down to two modes:

  • Active listening: 10-15 minutes per day, lyrics open, pausing and translating as you go
  • Passive exposure: Spanish music in the background during commutes, workouts, or household tasks

On top of that, pick one song per week for deeper analysis: a full lyric translation, a few grammar notes, and a short vocabulary list. That’s the full structure.

The goal isn’t to study songs; it’s to build enough daily contact with Spanish that the language starts to feel familiar before you ever open a grammar book. Most learners who stick with this find they’re getting 40-50 minutes of Spanish exposure per day without adding any extra time to their schedule.

Why Songs Work When Flashcards Don’t

Melody Gives Vocabulary Somewhere to Live

There’s solid research behind the music method. A study published in Memory & Cognition found that adults who learned foreign language phrases by singing them back significantly outperformed those who spoke them across multiple tests, including on longer-term recall. The melody appears to function as an extra memory cue, giving the brain an additional hook to retrieve vocabulary from.

This tracks with something most people already know: you can recall lyrics to a song you haven’t heard in a decade, but not the 20 Spanish words from last Tuesday’s Duolingo session. The difference isn’t effort; it’s encoding. Songs attach language to melody, rhythm, and often emotion, and those associations make recall measurably stronger.

Authentic Speech Patterns Textbooks Skip

One thing music does well that classroom Spanish rarely does: it exposes you to real spoken patterns. Contractions native speakers actually use (pa’ for para, vamo’ for vamos, na’ mas for nada mas), regional slang, verb tenses in natural context, and the rhythm of how Spanish actually flows.

Take Bad Bunny as a working example. The detailed Bad Bunny Baile Inolvidable lyrics breakdown on Bueno Spanish shows how a single song contains imperfect tense, reflexive verbs, subjunctive constructions, and a notable switch from tu to usted in the same track. That’s applied grammar in four minutes. You’d struggle to replicate that density with exercises.

Motivation That Doesn’t Dry Up After Week Two

Most Spanish learning routines collapse in the first month, not because the methods are wrong, but because they’re boring. Music sidesteps this problem almost entirely because your reason for listening has nothing to do with studying.

When we swapped our usual podcast-and-app Spanish practice for a music-first approach for 30 days, the main thing we noticed wasn’t a sudden spike in fluency. It was that we didn’t skip days. The passive listening slots, commute, gym, cooking, added up to 40-50 minutes of Spanish exposure daily without any extra time carved out.

Building Your Daily Spanish Music Practice

Start With Artists You Already Have Opinions About

The most common mistake is choosing songs based on what seems educational. Start with artists you already like. Bad Bunny, J Balvin, Shakira, Rosalia, Peso Pluma, Feid, and Natalia Lafourcade all work. Reggaeton and Latin pop tend to have high lyric repetition and conversational vocabulary, which makes them particularly effective for beginners.

If you’re at an intermediate level, branching into rock en espanol (Cafe Tacvba, Manu Chao) or cumbia introduces different vocabulary registers and regional accents that stretch comprehension in a useful direction.

The Three-Pass Method

For each new song, run three passes before moving on:

  • Pass 1: Listen without looking at anything. Note what you catch and what blurs together.
  • Pass 2: Follow the lyrics with a translation open. Pause at unfamiliar phrases and look them up. Aim for 70-80% comprehension, not 100%.
  • Pass 3: Sing or mouth along with the lyrics in front of you. This is where pronunciation work actually happens, and it’s the step most people skip.

One of our team noticed that after running pass 3 a handful of times with the same song, certain phrases started surfacing naturally in speaking practice weeks later. The rhythm of the song makes the phrase feel natural to produce.

Layering Music Into Habits You Already Have

The goal is passive exposure in slots that already exist. This is the same principle behind how to build a daily routine: stack new behaviors onto existing anchors rather than inventing new time blocks.

For Spanish music, the natural slots are:

  • Morning: one song while getting ready or having breakfast
  • Commute: switch part of your usual playlist to Spanish
  • Cooking or cleaning: background listening, no active analysis needed
  • Wind-down: slower Spanish music as a consistent end-of-day cue

The active three-pass sessions need only 15 minutes and can sit in any gap: lunch, before bed, a coffee break.

Where Music-Based Spanish Learning Tends to Go Sideways

Passive listening without any active work. Background exposure builds familiarity with how Spanish sounds, but it doesn’t build vocabulary or grammar on its own. If you never pause, translate, or sing along, you’re essentially just listening to music you don’t understand for a long time. Both active and passive modes need to be in the mix.

Chasing difficulty too early. Picking songs you can barely follow because they seem more authentic is a fast route to switching the playlist off entirely. Start where comprehension feels achievable with effort, not impossible.

Skipping the singing. It feels awkward for most adults, but it’s the step most supported by the research. You don’t need to do it at volume. Mouthing along or humming the melody still activates the memory encoding benefits. Private practice in the car or shower counts.

Over-relying on one artist or genre. Sticking to the same artist forever limits your exposure to vocabulary, accent, and speech register. Rotate regularly, and try to include at least one artist from a different Spanish-speaking country than your main one.

Treating progress as invisible. Music-based learning doesn’t produce obvious milestones the way apps do. Keep a short vocabulary log from your active sessions and revisit it weekly. The accumulation becomes clear faster than it feels.

spanish

What Shifts After 30 Days of Consistent Listening

The first thing most people notice is that Spanish audio starts to feel less like noise. Phrases that previously blurred together begin to resolve into distinct words. That shift usually happens within the first two to three weeks of daily listening.

Vocabulary retention is the second change. Words learned through songs tend to stick in a way that app-based vocabulary doesn’t, because they come pre-attached to a melody, a mood, and often a story. After 30 days, most learners have passively absorbed 100-200 new words or phrases without formal study.

The third is the one that matters most for the long term: Spanish stops feeling like homework. When your daily language contact is music you’d listen to anyway, the habit maintains itself without willpower.

Keep the active analysis sessions short and the passive exposure consistent. The routine compounds.

The Card Collector’s Maintenance Routine: How to Store and Protect Your Collection Properly

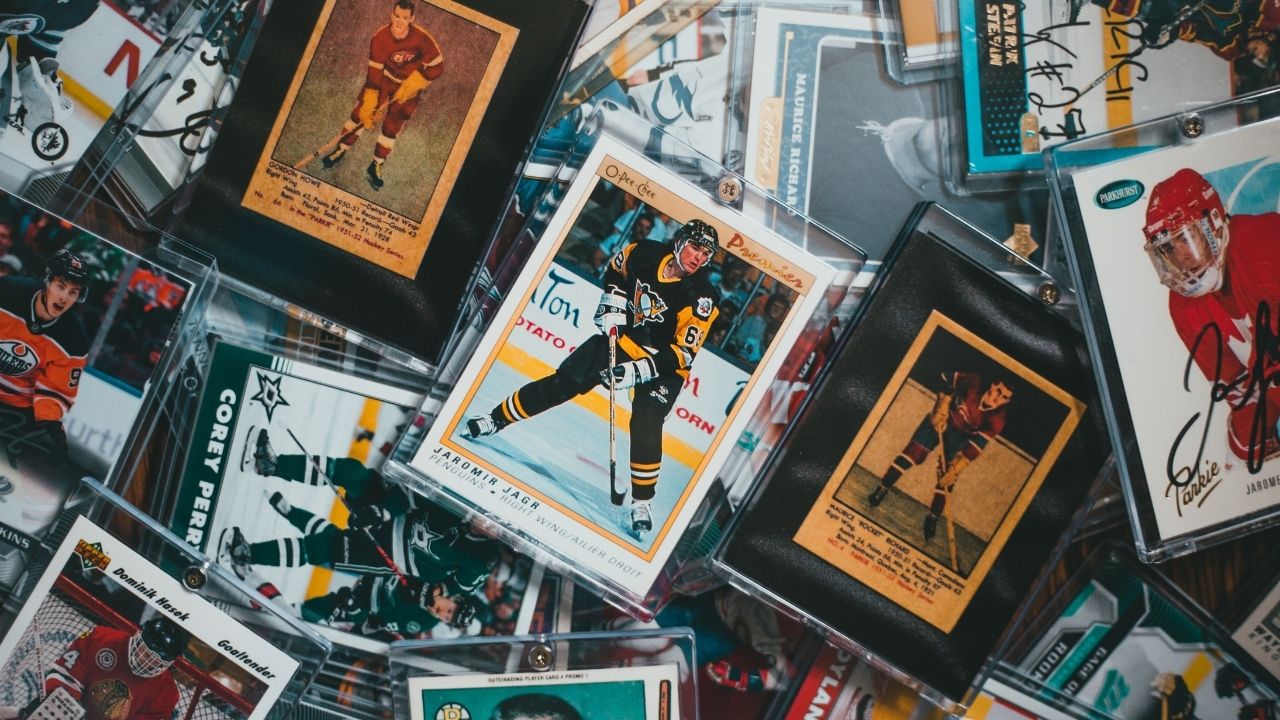
Most card collections don’t get damaged in one dramatic moment. They degrade slowly, card by card, through a combination of poor storage conditions, inconsistent handling habits, and a maintenance routine that never quite gets set up. Getting this right isn’t complicated, but it does require a system.

Whether you collect sports cards, Pokémon, Magic: The Gathering, or any other format, the threats to your collection are the same: moisture, heat, UV light, and physical contact. What follows is a practical framework for protecting cards at any collection size, from a few hundred commons to a high-value set worth grading.

card collecting

What a Solid Maintenance Routine Covers

A card collector’s maintenance routine has two jobs: protecting cards from physical damage and keeping their storage environment stable over time. Physical protection means the right sleeves, holders, and containers. Environmental stability means controlling humidity, temperature, and light in your storage space.

Done well, both become a background habit rather than an active project. Done badly, or not at all, you’ll notice the damage when it’s already too late to fix it.

The four main threats to card condition are:

  • Surface damage: scratches, fingerprints, dust, and oils from handling
  • Humidity: the leading cause of warping, mold, and foil delamination
  • Temperature swings: rapid changes stress a card’s layers unevenly, causing internal warping and peeling
  • UV light: fades color, degrades finishes, and weakens holographic surfaces over time

Everything in a solid storage routine is a direct response to one of these four threats.

The Layered Protection System Most Collectors Use

The standard approach in the collecting community is layered protection: each card gets a base sleeve, and more valuable cards get a second, rigid layer on top of that.

Penny Sleeves and Standard Card Sleeves

Every card in your collection should be in a sleeve. Penny sleeves are the most affordable option, lightweight enough to use on everything including bulk commons. For active collections, better-quality card sleeves offer thicker material, a smoother feel, and more consistent sizing that reduces stress on corners when cards are inserted and removed.

Good sleeves protect against surface contact, dust buildup, and the casual scuffing that happens when cards shift against each other in a box or binder. TitanShield’s sleeves are made with archival-safe, PVC-free materials and come in sizes for every major TCG format, which is useful when you’re running a mixed collection across Pokémon, MTG, sports cards, or other formats.

Toploaders and Magnetic Holders for Higher-Value Cards

For cards worth protecting beyond the basics, a toploader or magnetic one-touch holder adds a rigid outer shell that prevents bending. Toploaders work well for mid-range value cards and are stackable, making them practical for storage boxes. Magnetic holders are better suited to high-value singles or cards you’re displaying or planning to send for professional grading.

A common setup: penny sleeve first, then into a toploader. The sleeve prevents the card from sliding around inside the rigid holder and adds a friction buffer against the plastic edges.

Binders vs. Storage Boxes

These aren’t mutually exclusive, and most collectors use both. Binders are better for sets you want to browse, cards you’re actively sorting, and collections you take to shows or trades. Storage boxes handle volume more efficiently and keep cards upright and stable in bulk.

If you’re using binders, confirm the pages are made from archival-safe, acid-free, PVC-free material. Standard office binder pages can leach chemicals into cards over time, particularly in warm environments.

The Environment Is Doing Most of the Work

You can invest in the best sleeves and the thickest toploaders available, and still end up with warped cards if the room they’re stored in runs too humid. Environment is the most underestimated part of card care.

The consensus across the collecting community points to 45-55% relative humidity and 65-72°F (18-22°C) as the stable target range. These are the same conditions used by archival institutions for long-term paper preservation. The bigger danger isn’t hitting the wrong number once; it’s constant fluctuation. When temperature swings rapidly, the card stock, printed ink layer, and any foil elements expand and contract at different rates. That creates internal stress that eventually shows up as warping or edge peeling.

Above 60% relative humidity, foil cards start to delaminate as the laminated layers absorb moisture unevenly. At 70% and above, mold becomes a real risk. The complete guide to moisture control from EVORETRO covers the science behind this in detail if you want to go deeper.

What this means in practice:

  • Avoid basements and attics: both are prone to humidity spikes and temperature extremes. Most interior rooms in a climate-controlled home are fine.
  • Add silica gel packets to storage boxes to absorb ambient moisture, and replace them when they’re saturated.
  • Use a hygrometer to monitor the humidity in your storage space. Small digital models are inexpensive and accurate enough for this purpose.
  • Keep cards away from windows and exterior walls, particularly if you live somewhere with significant seasonal temperature changes.

One of our team learned this the hard way after storing a binder on a shelf near a south-facing window for a summer. Several holographic cards in the set had developed edge curl by the time it was noticed. No amount of flattening brought them back to grade-eligible condition. UV exposure and heat together are a fast way to lose value on foil-heavy sets.

The Handling Side of the Routine

Good storage conditions don’t help much if handling habits are careless. A lot of card damage happens during the moments between storage: when you’re sorting, showing, or reviewing the collection.

The fundamentals here are straightforward:

  • Wash hands before handling any cards, particularly higher-value ones. Skin oils transfer easily and leave residue that’s difficult to remove without risking surface damage.
  • Hold cards by their edges, not their faces.
  • For particularly valuable cards, nitrile or cotton gloves add an extra layer of protection against fingerprints and accidental pressure.
  • Don’t stack raw (unsleeved) cards face-to-face under pressure. Even light pressure over time causes surface wear.
  • When inserting cards into sleeves or binders, do it slowly. Forcing a card in at a slight angle is how corners get dinged.

card collecting

Where the Routine Tends to Break Down

Even collectors who start with a solid system let certain things slip over time. These are the most common points of failure.

Mixing Old and New Sleeves Without Checking

Plastic sleeves degrade over time. Older PVC sleeves in particular become cloudy, brittle, and chemically reactive. If you inherited a collection or bought cards in bulk, re-sleeve everything before it goes into long-term storage.

Ignoring the Bulk

It’s easy to give premium treatment to the top 5% of a collection and leave everything else in a cardboard shoebox. The problem is that bulk cards stored badly can transfer damage to other cards, and they make the collection harder to maintain overall. Everything should at least be in a basic sleeve and stored upright in a proper box.

Treating Storage Setup as a One-Time Task

A maintenance routine isn’t one-time setup; it’s an ongoing habit. Checking on storage conditions quarterly, rotating silica gel packets, and doing a visual inspection of binders and boxes for early signs of warping or discoloration takes less than an hour and can catch issues before they spread.

Using Rubber Bands, Zip-Lock Bags, or Non-Archival Storage

All three are common shortcuts that cause real damage. Rubber bands apply uneven pressure and cause warping. Standard zip-lock bags trap moisture. Non-archival plastics can leach chemicals that affect card surfaces over time. None of them have a place in a collection you care about.

Skipping Professional Grading on Cards That Warrant It

For high-value cards, professional grading does two things at once: it gives the card a market-recognized condition grade on a 1-10 scale, and it seals it in a tamper-proof case that removes the need for ongoing storage management. PSA, BGS, and SGC are the main services; each has different fee structures, turnaround times, and resale premiums, so it’s worth understanding the difference before your first submission.

Building This Into an Actual Habit

The collectors who maintain their collections well aren’t spending hours on it every week. They’ve built a few consistent habits that run in the background. A practical version of the card collector’s maintenance routine looks something like this:

  • After every new addition: sleeve it before it goes anywhere near the rest of the collection. This one habit eliminates most surface damage.
  • Monthly: check silica gel packets in storage boxes, do a quick visual scan of binder pages, and replace any sleeves that look cloudy, cracked, or misshapen.
  • Seasonally: check the storage environment with a hygrometer, particularly when seasonal shifts change the ambient humidity in your home. This is also a good time to assess whether anything in the collection is approaching submission-worthy condition.
  • Annually: do a full audit of the collection, update any digital or spreadsheet inventory you’re keeping, and make grading and insurance decisions on anything that has moved up in value.

Building this kind of structured maintenance into a regular habit is the same principle that makes any long-term routine stick: consistent, low-effort actions repeated on a schedule, rather than sporadic deep-clean sessions that feel like a project. If you’re newer to that approach, the framework in our guide on how to build a daily routine applies just as well to hobby maintenance as it does to health and productivity habits.

The collection that holds its value over ten years isn’t the one that got the most expensive storage products. It’s the one that got consistent attention.

The Complete Rock Climbing Training Routine: What to Do, Wear, and Bring at Every Stage

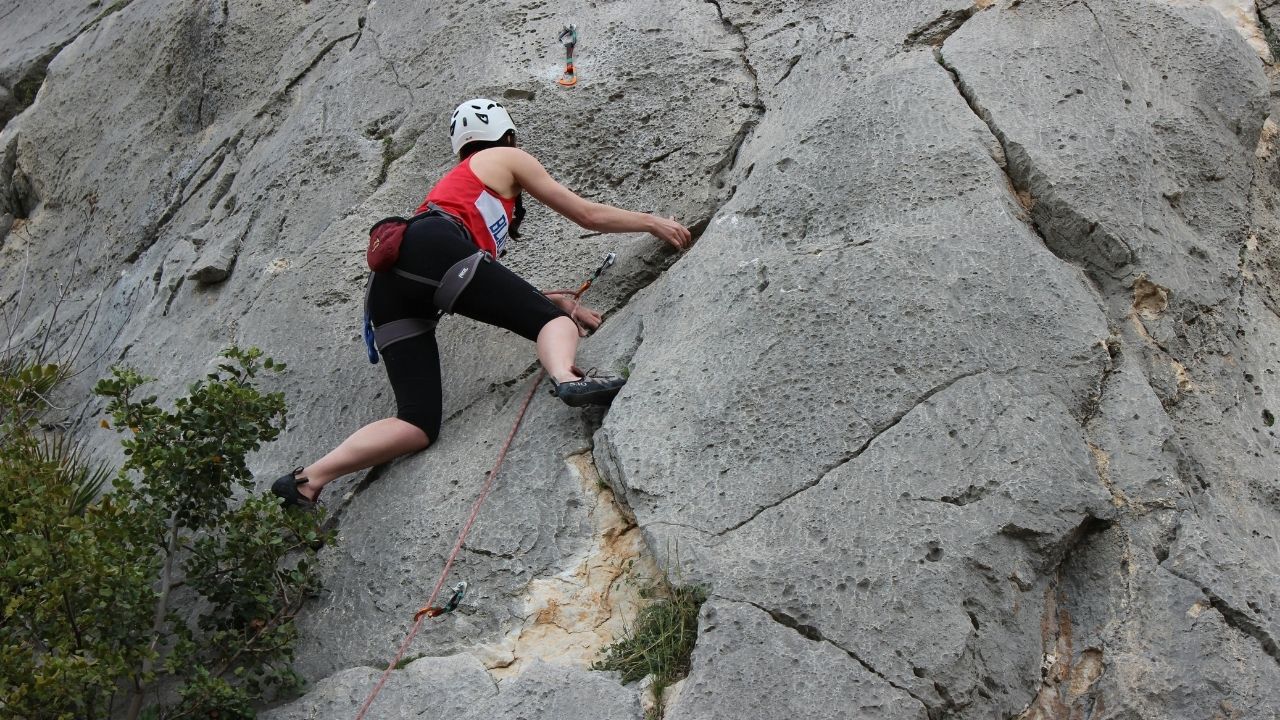
Rock climbing has a straightforward ask: show up with the right gear, the right clothes, and a plan that matches where you are in your progression. Whether you’re heading to an indoor gym for the first time or preparing for your first outdoor lead climb, what you bring and how you train shifts at every stage.

This guide covers the full picture: gear by experience level, clothing that won’t hold you back, and a training structure that actually builds progress rather than just burning you out.

rock climbing

What the Rock Climbing Training Routine Actually Covers

The short answer is this: a complete rock climbing training routine has three layers: gear, clothing, and structured practice time. At the beginner stage, that means a handful of borrowed or rented essentials and two to three days a week on the wall. At the intermediate level, you’ll own your own kit, move outdoors, and start adding supplementary strength work. Advanced climbers follow periodized training blocks, use fingerboards, and manage load across multiple sessions per week.

Getting all three layers right at your current level is what separates consistent progress from spinning your wheels (or getting injured).

Gear You Need at Each Stage

Starting Out: What the Gym Provides vs. What You Should Own

Most climbing gyms rent everything you need for a first visit: climbing shoes, harness, chalk bag, and belay device. That’s genuinely all you need for session one. Don’t rush to buy gear before you know you’ll stick with it.

Once you’ve confirmed you’re coming back regularly, the first things worth owning are climbing shoes and a chalk bag. Rental shoes fit poorly, wear down faster, and often perform worse on technical footwork. A well-fitted pair of beginner shoes (neutral or slightly flat profile, not aggressively downturned) makes a noticeable difference in how you learn foot placement. For the chalk bag, it’s a personal preference item, but having your own means it’s always stocked.

The next logical purchase is a harness. A basic sit harness runs $40-70 and fits more reliably than rental stock. From there, if you’re moving into top-rope or lead climbing beyond the gym’s loaner gear, add a locking carabiner and a belay device (tube-style ATCs and auto-locking GriGris are the two most widely accepted in gyms).

Intermediate: Outdoor Climbing Adds to the List

The jump to outdoor climbing changes your gear needs significantly. A helmet becomes non-negotiable; rock fall, loose debris, and unexpected tumbles all justify it in ways that gym walls don’t. Outdoor-specific shoes (often slightly more aggressive than your gym pair) and a personal rope (9.8mm is a widely used, durable diameter for sport climbing) come into play once you’re leading outdoors regularly.

For sport climbing at a crag, you’ll also want a set of quickdraws to clip bolts, plus a more comprehensive chalk setup (liquid chalk is popular for its staying power on longer pitches). A small daypack or crag bag holds your layers, water, snacks, and extra gear without the bulk of a full mountaineering pack.

Some intermediate climbers heading into more technical terrain also invest in custom climbing equipment: compression layers, personalized chalk bags, and team gear kits that hold up to regular use outdoors.

Advanced: Training-Specific Tools

Advanced climbers add a fingerboard (hangboard) to their home or gym setup. This is a purpose-built grip-strength tool mounted at a doorframe or wall, used for structured hanging protocols rather than just pulling up on holds. It’s not a beginner tool, and most coaches suggest waiting until you’ve climbed consistently for at least 12-18 months before using one, as tendon tissue takes time to adapt.

A foam roller, resistance bands for antagonist muscle training, and a training log (even a basic notebook) round out the advanced climber’s kit. Tracking your sessions helps you identify overtraining early, see where you’re improving, and adjust volume intelligently.

What to Wear to Every Session

The Clothing Logic for Climbing

The single rule is: nothing that limits your range of motion. Climbing requires high steps, wide hip positions, and shoulder reach that standard gym clothing can fail to support. Beyond that, you want fabric that breathes and doesn’t bunch against the wall.

For bottoms, stretchy leggings or athletic tights are the most popular choice because they move with you and don’t snag on holds. Tapered joggers work well too, as long as the ankle isn’t loose enough to catch underfoot. Regular jeans, unless they’re a high-stretch denim blend, are generally too restrictive for anything technical. Longer shorts (mid-thigh or below) are also a reliable option and protect your knees during high-step sequences.

For tops, fitted is better than baggy. A moisture-wicking T-shirt or tank top handles the physical demand; avoid anything with excess fabric at the torso since it can catch on handholds or obscure your view of your feet on the wall. In cooler gyms or during rest periods between climbs, a lightweight hoodie or zip fleece is worth having in your bag.

Footwear and a Note on Socks

Off the wall, wear slip-on shoes or sandals around the gym. This keeps your climbing shoes from picking up dirt from the floors, which transfers to holds and reduces friction for everyone. Most climbers go sockless in their own shoes for better sensitivity and feel; if you’re renting, thin liner socks are a practical hygiene option.

Outdoor Climbing Adds Layers

For outdoor sessions, layer up. Temperature at the crag can be unpredictable, and you’ll cycle between active climbing and waiting at the base. A lightweight windbreaker, a warm hat for shady belays, and sun protection on exposed rock all earn their place in the pack.

How to Structure Your Training Week

Building the Base: Beginner Sessions

A good starting point for beginners is two climbing days per week with at least one full rest day between them. The focus at this stage should be almost entirely on technique, not strength. Beginner climbers improve fastest by climbing a wide variety of routes at comfortable grades, not by grinding on problems that are too hard.

A standard session structure: 15 minutes of warming up on easy routes, 45-60 minutes of intentional climbing (try new movement patterns, focus on footwork, don’t rush), and a cool-down stretch targeting forearms, shoulders, and hips. One of our team spent her first three months almost entirely on 5.8-5.9 routes and found that the variety of different wall angles and hold types built more usable strength than trying to red-point harder grades early.

Intermediate: Adding Structure to Climbing Days

Once you’re climbing at a solid intermediate level (roughly 5.10-5.11 indoors, or comfortable with outdoor sport climbs), a three-day-a-week structure becomes effective. Two of those days can focus on climbing itself, and one on dedicated supplementary work: pull-up variations, core exercises, and antagonist training (wrist extensions, shoulder external rotation work) to offset the pulling-dominant demands of climbing.

One session per week is a good time to introduce “limit bouldering”: spending time on problems at or just above your flash level. Keep attempts brief (three tries per problem is a useful cap) and rest fully between burns. The goal is quality recruitment, not volume.

ARC training (Aerobic Restoration and Capillarization) is another useful tool here: 20-30 minutes of continuous, easy climbing at 40-50% effort, moving smoothly without rest. It builds endurance and helps you recover faster between hard moves.

Advanced: Periodization Matters

For advanced climbers, following unstructured “just go climb” sessions for months at a time typically leads to plateaus. A periodized approach breaks your training year into focused phases: base endurance, strength (hangboard, limit bouldering), power (dynamic movements, campus rungs for those at that level), and power-endurance (sustained hard climbing), followed by a peaking phase before a trip or goal route.

Block periodization works well for breaking plateaus but requires careful management. Non-linear periodization, training multiple qualities within the same week while emphasizing one, suits climbers who need to maintain broad fitness year-round. For anyone planning a structured season, reading up on building a consistent training routine translates directly to how you sequence and schedule climbing blocks.

rock climbing

Where Climbers Most Often Go Wrong

Skipping the warm-up. The climbing community has largely figured out that jumping straight onto hard routes without warming up is one of the most reliable ways to end up with a finger injury. At minimum, 20-30 minutes of easy climbing before anything hard is a reasonable standard. A few minutes of tendon glides, light resistance band work, and dynamic shoulder movement takes it further.

Overloading fingers before tendons adapt. Muscles respond to training faster than tendons and pulleys. That gap between what your muscles feel capable of and what your connective tissue can handle is where most climbing finger injuries occur. Beginners especially should resist the pull of hangboards; the risk-to-reward ratio before 12-18 months of consistent climbing doesn’t hold up.

Cramming too many sessions into the week. Climbing two days in a row occasionally is fine; making it a consistent pattern without adequate recovery tends to compound fatigue and elevate injury risk. Strong sport climbers generally train every other day, not every day. Listen to what feels like normal muscle soreness versus what feels like joint or tendon pain. They aren’t the same thing.

Ignoring footwork in favor of pulling harder. A large portion of beginner and intermediate progress comes from learning to trust your feet, not your arms. Climbing is much more efficient when you drive upward through leg extension. Drills like “quiet feet” (placing each foot slowly and precisely without scraping) and “straight arms” (keeping arms extended to reduce fatigue) address this directly.

Showing up at peak hours for endurance work. ARC training and mileage-building requires continuous movement on the wall. Doing that during a crowded evening session isn’t practical or considerate. Lower-traffic hours or dedicated wall traverses (horizontal movement, back and forth) work much better.

Building the Habit That Gets You Stronger

The most consistent predictor of climbing improvement is showing up regularly over months, not how hard any single session was. Two well-structured sessions per week, sustained over six months, will produce more progress than three chaotic ones with no recovery strategy.

Track your sessions, even loosely: what you climbed, how your fingers felt, and what you’re working on. This makes overtraining visible before it becomes an injury, and it helps you notice patterns in your progress.

Rock climbing rewards the patient approach. The climbers who improve fastest are usually the ones who’ve learned to read their body’s signals, respect rest days, and stay curious about movement rather than fixating on grades. Your gear, your clothing, and your training structure all support that foundation, but the foundation is consistency itself.

The Outdoor and Active Women’s Gear Checklist: What to Have in Your Kit Before You Head Out

A good outdoor kit isn’t just a pile of gear, it’s a system. Get it right before you leave, and everything from a two-hour trail run to a full-day hike feels easier, safer, and more enjoyable. Get it wrong, and you’ll be adjusting wet socks, rooting around a disorganized pack, or wishing you’d packed that extra layer before you even hit the trailhead.

This checklist is built to work as a repeatable pre-trip routine, something you run through every time you head out, not just the first time. We’ve broken it down category by category so nothing gets overlooked, whether you’re new to trail time or you’ve been doing this for years.

woman hiking

The Gear Every Active Woman Needs Before She Heads Out

Here’s the core of a solid women’s outdoor kit for day hikes, trail runs, and active outdoor days:

  • Bottoms: Moisture-wicking, movement-friendly pants or leggings suited to terrain
  • Base layer top: Synthetic or merino wool; never cotton
  • Mid layer: Lightweight fleece or insulated jacket (even in summer)
  • Outer layer: Packable waterproof shell
  • Footwear: Trail shoes or hiking boots with grip, paired with wool or synthetic socks
  • Daypack: 10-30L depending on trip length, with a hip belt for longer outings
  • Water: Minimum 500ml per hour of activity; more in heat or at elevation
  • Nutrition: Calorie-dense snacks; whole meals for hikes over 4 hours
  • Navigation: Offline maps or downloaded GPS route; paper map as backup
  • First aid kit: Including blister care, antiseptic, and any personal medications
  • Sun protection: SPF 30+ sunscreen, UV-rated sunglasses, sun hat or cap
  • Headlamp: With fresh or spare batteries
  • Emergency basics: Whistle, emergency blanket, small multi-tool

This list applies to most day outings. For multi-day trips, backcountry routes, or technical terrain, you’ll need to expand on several categories, particularly navigation, shelter, and nutrition.

Category by Category: What Goes in Your Kit

Bottoms That Work Harder Than Leggings

What you wear on your lower half sets the tone for the whole day. For light trails and lower-mileage active days, moisture-wicking leggings with secure pockets do the job well. For anything more demanding, such as brushy terrain, full-day hikes, or variable weather, a purpose-built trouser offers better protection and durability.

The best women’s outdoor pants combine stretch fabric with a fitted cut, cargo-style pockets positioned for real use, and materials that resist snags, moisture, and abrasion. Tactical pants for women are worth considering here: they’re engineered for durability and mobility, with reinforced stitching and pocket layouts designed around actual utility rather than aesthetics. They’re increasingly popular with hikers and trail runners who want pants that handle demanding terrain without sacrificing comfort.

Whatever you choose, avoid jeans and standard cotton trousers. Cotton holds moisture, restricts movement, and causes chafing on longer outings.

Layering From Base to Shell

Layering is one of the most important skills in any active woman’s outdoor routine. The general principle is three layers: base, mid, and outer.

Base layer is the one against your skin. It should be moisture-wicking, quick-drying, and ideally made from merino wool or a synthetic blend. Merino is worth the investment if you’re doing multi-day trips since it resists odor better over time. For day hikes, a good synthetic base layer is typically enough.

Mid layer provides insulation. A lightweight fleece or a packable down or synthetic insulated jacket fills this role. Even on warm days, temperatures at elevation or after sunset can drop faster than expected. We’ve been caught more than once packing for the forecast and wishing we’d added that extra layer. One of our team makes it a rule to always throw a mid layer in the pack, regardless of the weather app.

Outer layer is your protection against wind and rain. A packable waterproof shell that weighs under a pound is ideal. Look for taped seams and a hood that fits over a helmet or buff if you need it. Breathability matters on active days where you’re generating heat.

Footwear and Socks

Footwear is arguably the most important gear decision for active outdoor days. The wrong choice causes blisters, reduces traction, and increases injury risk, particularly on uneven or wet terrain.

For light trails and maintained paths, trail running shoes with decent grip are often enough and add less weight than boots. For longer hikes, wet or technical terrain, or routes with significant elevation gain, a pair of well-fitted hiking boots with ankle support and a waterproof membrane is the stronger call.

Socks deserve as much attention as shoes. Wool or synthetic hiking socks prevent the friction that causes blisters. Cotton socks are a trail mistake most women only make once. If you’re blister-prone, a thin liner sock under your hiking sock adds an extra layer of protection.

Break in new footwear on shorter outings before committing them to a full day on the trail.

What Goes in the Pack

Pack size depends on trip length. A 10-20L daypack covers most half-day and full-day hikes. Look for a ventilated back panel, a hip belt (essential for anything over 5 miles), and a dedicated hydration sleeve if you prefer a reservoir over bottles.

Inside the pack, organization matters. Most active women find it useful to keep emergency items, first aid, and navigation tools in the same accessible outer pocket every time. Snacks and a mid layer go at the top of the main compartment for quick access. Heavier items, like a water reservoir, belong close to your back.

On hydration: a commonly cited benchmark is around 500ml of water per hour of moderate activity, with more needed in heat or at altitude. For a standard 3-4 hour day hike, plan to carry at least 1.5-2 liters. A water filter or purification tablets are worth carrying on remote routes where you can access natural water sources.

For food, prioritize calorie-dense, low-bulk options. Nuts, dried fruit, protein bars, and whole-grain crackers hold up well without refrigeration and deliver sustained energy on longer outings.

Safety and Navigation Essentials

Navigation tools are non-negotiable once you’re off well-marked, easily-navigable trails. At a minimum, have an offline map downloaded to your phone via an app like AllTrails or Gaia GPS before you leave. Cell service in remote areas is unreliable, and you don’t want to discover that mid-route. A paper topo map and compass as backup is worth adding for any backcountry route.

REI’s hiking essentials framework, which draws on the outdoor industry’s widely used Ten Essentials system, is a reliable reference point for safety gear. Beyond navigation, this includes illumination (headlamp with fresh batteries), sun protection, first aid, fire-starting kit, and an emergency shelter such as a lightweight bivvy or foil blanket.

A whistle belongs on your pack strap or accessible in a hip belt pocket. It carries further than your voice and costs almost nothing.

Building This Into a Pre-Trip Routine

The gear list only works if you actually check it before every outing. That’s where routine comes in.

We recommend a consistent pre-trip run-through, ideally the evening before, so you’re not making gear decisions at 6am in the dark. Here’s a sequence that works well:

  1. Check the forecast and adjust your layers accordingly. Rain coming? Waterproof shell goes in. Hot day? Swap the heavier mid layer for a packable option.
  2. Fill your water supply the night before. Hydration bladders and bottles take time; doing it in the morning rush often means heading out under-supplied.
  3. Pack your safety pouch first. First aid kit, headlamp, whistle, emergency blanket. These go in before anything else, so you know they’re there.
  4. Set out your clothing and check your footwear. Are your boots dry from the last outing? Laces intact? Footwear checks take 30 seconds and prevent a lot of frustration.
  5. Charge your devices. Phone, GPS unit, satellite communicator if you carry one.
  6. Leave a trip plan with someone. Route, start time, expected return, and emergency contacts. It takes two minutes and it matters more than most gear items if something goes wrong.

This kind of structured prep is what separates the experienced outdoorswomen from those who regularly find themselves improvising on the trail. If you’re working on building reliable routines across other areas of your life too, this guide to daily routine building applies the same principles to everyday habits.

woman hiker

Where Active Women’s Kits Tend to Come Up Short

Even well-prepared hikers and trail runners have consistent blind spots. These are the gaps we see most often.

Skipping the mid layer on warm weather outings. Temperature drops fast at elevation and in shaded terrain. A 70-degree day at the trailhead can feel 20 degrees colder at the summit. Pack the layer even when you don’t think you’ll need it.

Underestimating sock quality. It’s tempting to cut weight or cost here, but poorly fitted socks cause more outdoor trip interruptions than almost any other gear item. A quality pair of wool hiking socks is one of the best investments in the whole kit.

Phone-only navigation. Screen visibility drops in bright sunlight, batteries drain faster in cold temperatures, and cell service disappears in remote terrain. An offline-capable navigation app with maps downloaded in advance is the minimum. A paper backup is better.

No blister kit. A few moleskin squares and blister patches add almost no weight but can rescue an outing that would otherwise end early. They’re particularly important when breaking in new footwear.

Under-packing food. Active outdoor days burn significantly more calories than most people expect, particularly at elevation. Feeling low on energy on the descent is uncomfortable; feeling low on energy in technical terrain can be dangerous. Pack more than you think you need.

Worn-out waterproofing. If your outer layer has been through a few seasons and you haven’t re-proofed it, it may no longer be doing its job. A DWR re-treatment spray costs a few dollars and restores performance.

The Kit That Goes Out Every Time

The best outdoor kit is a consistent one. Not the most expensive, not the most technical, but the one you’ve organized well, know inside out, and check the same way before every outing.

Once you’ve built your core kit, the routine becomes faster. The night-before pack check drops to under ten minutes. You stop forgetting things and start enjoying the actual experience more.

Focus on getting the non-negotiables right first: bottoms you can move in, a functional layering system, footwear that’s properly broken in, and a pack with water, food, and a basic safety setup. The rest can be refined over time as you learn what your outdoor outings actually demand.

The Family Memory Routine: How to Preserve Every Milestone Before It Slips Away

The first time most families think seriously about preserving memories is after something is already gone: a grandparent’s voice, the specific way a toddler mispronounced a word, the look of a birthday table they swore they’d remember. A family memory routine solves this by building small, consistent habits around capturing and organizing milestones before they fade. It doesn’t require a dedicated weekend or an expensive setup. It requires a repeatable system that fits into everyday life.

Here’s how to build one.

family photo book

What a Family Memory Routine Actually Looks Like

A family memory routine is a set of recurring actions that ensure your milestones, big and small, are captured, stored, and organized in a form you can actually find and use later. It works in three layers: in-the-moment capture, monthly organization, and an annual archive and print pass.

The goal isn’t completeness. It’s consistency. A routine you maintain 80% of the time across years will produce a richer family record than a single ambitious project you abandon after a month. In most cases, the families with the best-preserved memories aren’t the ones who do the most at once; they’re the ones who’ve built the smallest sustainable habits and stuck to them.

The three-layer structure breaks down like this:

  • Daily or in-the-moment: capture photos, voice notes, and written details as things happen
  • Monthly: sort, label, and add context to what you’ve collected
  • Annually: archive, back up, and create a tangible output such as a printed photo book

Building Your Capture Habit, One Layer at a Time

The Daily and In-the-Moment Pass

The most important part of the routine isn’t the most elaborate. It’s the habit of capturing things when they happen, rather than relying on memory to reconstruct them later.

Smartphone photography handles most of this automatically for visual moments. The gap, almost universally, is context. A photo of a child blowing out candles is easy. A note that says “he asked for a pirate ship cake for two years in a row and was furious both times when we made it correctly” is the kind of detail that makes a photo meaningful 20 years later.

A few habits that work well here:

  • Use your phone’s voice memo app to record a 30-second note after a milestone moment, while the details are still vivid
  • Keep a simple shared note in Google Keep or Apple Notes labeled “family moments” and drop in one or two lines when something worth remembering happens
  • For bigger milestones, take a second photo that includes environmental context: the room, the setting, the other people nearby

One of our team members started doing a voice note at the end of each month’s first Sunday, just a 2-3 minute recap of what happened that month with the kids. It sounds minimal, but after 18 months, that audio record is something no photo album can replicate.

You don’t need to do all of these. Pick the one that causes the least friction and build from there.

The Monthly Sort and Context Pass

Once a month, ideally at a fixed time, you do a single pass through everything you’ve captured. This doesn’t need to take more than 20-30 minutes.

The tasks for this pass are straightforward: move photos from your camera roll into a labeled folder (year, then month), add names and dates to any unlabeled images, attach your voice notes or written context snippets to the relevant photos, and delete the obvious duplicates.

The labeling step is the one most families skip, and it’s the one that matters most for long-term memory keeping. A folder called “2024-06” is useful. A folder called “2024-06 – Maya’s kindergarten graduation and summer lake trip” is something you can actually navigate.

For families using Google Photos or Apple Photos, the organizational tools are already there. The habit is just deciding to use them.

The Annual Archive and Print

Once a year, typically at the end of December or early January, you do the full archive pass. This has two parts: a digital backup audit and a physical output.

For the digital backup, the American Red Cross recommends storing copies in at least two locations, including a cloud service such as Google Drive, Amazon Photos, Dropbox, or iCloud, and an external hard drive kept somewhere separate from your primary home. This is especially important because digital files aren’t permanent by default. Hard drives fail, cloud subscriptions lapse, and phone backups can go missing after an upgrade. You can read more about preserving your memories in detail on the Red Cross site.

For the physical output, a printed photo book is one of the most reliable formats for long-term, accessible family record-keeping. Services like Mixbook let you build custom photo books from your existing photo library, with templates that handle most of the layout work. An annual family photo book, even a short one, creates a tangible record that doesn’t depend on a platform staying operational or a file format remaining readable.

Where to Keep Everything (and How to Make Sure It’s Findable)

Storage systems fail when they’re too complicated to maintain or too scattered to navigate. The most practical approach for most families is a three-part structure: a primary cloud library for photos and videos, a single notes document or journal for written context and stories, and a physical location for tangible keepsakes.

The cloud library handles the volume. Something like Google Photos or iCloud, with automatic backup turned on, ensures you’re not losing daily captures. The key habit here is adding your labeled folder structure on top of it during the monthly pass.

The notes document is underused by most families but genuinely valuable. A single document, updated monthly, that records the key stories, funny quotes, developmental notes, and context behind your photos takes maybe five minutes a month to maintain and becomes something irreplaceable over years.

The physical location, a dedicated box, drawer, or shelf, handles the things that don’t digitize well: birthday cards, report cards, small keepsakes, a child’s first drawing. Keeping all of it in one place, rather than scattered across multiple containers, means you can actually find it later.

The guiding principle for storage is to keep the number of locations minimal. Every additional location is a place where things get lost.

taking photos

The Milestones Most Families Forget to Document

The major milestones, first days of school, graduations, holidays, tend to be well-photographed. The ones that slip through most often are the ones that feel ordinary at the time.

A few worth being intentional about:

Everyday routines with your kids. The school drop-off routine, the specific way bedtime worked, the inside jokes that developed around dinner. These feel permanent while they’re happening and then become nearly impossible to reconstruct once they’ve changed.

The ages just before and after a transition. Families often photograph the event itself, the new baby, the first day at a new school, the move to a new house, but not the period just before it ended. A few photos and notes from the week before a major change capture something irreplaceable.

Your own routines as a parent or partner. Most family memory keeping focuses on children, which makes sense. But the habits, schedules, and daily life of the adults in the family are also worth documenting. Future generations are often just as curious about those as about children’s milestones.

Unscripted moments at gatherings. The conversation that happened in the kitchen at Thanksgiving, not the posed table photo, is usually what people remember most. A quick video or voice note after a family gathering captures the texture of the event in a way that formal photos don’t.

Family recipes and the stories behind them. A recipe card becomes much richer when it includes who first made it, when it appeared in the family, and what was idiosyncratic about the way your version was prepared.

Where Family Memory Routines Tend to Fall Apart

A few patterns show up consistently in families who’ve tried to build this kind of system and struggled.

Starting too big. A routine that requires two hours a month to maintain will last three months. A routine that requires 20 minutes will last years. Scale to what you’ll actually sustain, not to what feels comprehensive in the planning stage.

Keeping photos in too many places. Phone camera roll, a second phone, a partner’s camera roll, a shared family album, iCloud, and a Google account is a recipe for losing things. Consolidating to one primary library is worth the one-time effort.

Skipping the context layer. Photos without names, dates, or stories lose most of their value within a generation. Adding a sentence of context to each photo or album, even just the date and who’s pictured, is the single highest-leverage habit in memory keeping.

Waiting to organize until you have time. The monthly pass exists specifically to prevent a backlog from building. A 20-minute session once a month is far easier than a 10-hour session once a year. Building a daily routine that includes even minimal organization habits goes a long way here; this guide to how to build a daily routine covers the habit-stacking principles that make these small passes easier to maintain.

Relying entirely on digital storage. Cloud platforms change, accounts lapse, and formats become unreadable. Physical outputs, including printed books, serve as a hedge against digital loss and as objects that can be shared without a device.

Turning the Routine Into Something That Outlasts You

The families with the richest memory archives aren’t usually the ones with the most sophisticated systems. They’re the ones who decided that preservation was worth a small, consistent investment of time, and who kept showing up to do the monthly pass even when it wasn’t convenient.

A few things that make the routine stick over the long term:

Keep the primary habit visible. A label on your calendar for the monthly sort, a designated shelf for physical keepsakes in a room you use every day, these make the routine part of your environment rather than something you have to remember separately.

Involve other family members where it’s natural. Kids can be part of choosing which photos go in the annual book. A partner can share the monthly sort. Grandparents can contribute voice notes or written stories about their own memories during the annual pass. The more distributed the practice, the less it depends on one person to sustain it.

Make the output something people actually use. An annual photo book that sits on the coffee table and gets looked through during family gatherings is a different object than one that sits in a box in the attic. The more accessible and tangible your outputs, the more the routine reinforces itself.

Consistent beats perfect. A complete record of the ordinary years is worth more than a detailed archive of one exceptional one.

Frequently Asked Questions

How do you preserve family memories long-term? The most reliable approach combines consistent digital capture with a structured organization habit, a cloud backup in at least one location, and a physical output such as a printed photo book each year. Adding written context to photos, including names, dates, and brief stories, significantly increases their long-term value.

What milestones should families make sure to document? Beyond the obvious events like birthdays and graduations, the most commonly missed milestones are everyday routines with young children, the period just before a major life transition, and unscripted moments at family gatherings. Recipes, written stories from older relatives, and the daily habits of adults in the family are also worth capturing.

How often should families back up their photos? Cloud backups should be automatic and continuous. A manual backup audit, checking that both cloud and physical backups are current and accessible, is worth doing once a year during the annual archive pass.

What’s the best way to organize family photos? A folder-based system organized by year and month, with descriptive labels added during a monthly sort pass, works well for most families. Adding names and context notes within the labels makes photos significantly easier to find and more meaningful later.

Do you need a lot of time to maintain a family memory routine? No. The core habit structure described here requires roughly 5-10 minutes of daily or in-the-moment capture, 20-30 minutes for the monthly sort, and a few hours once a year for the archive and print pass. Most families find the monthly pass is the one that needs to be explicitly scheduled; the rest integrates naturally once the habit is established.